Creating a Schedule Board

In this I will be showing you how to create a schedule board, this will be using the specific example of a RAID Board / Task list but there are many uses, for example
- Meetings board
- Holiday and absence board
- Project delivery board.
Its a really good way of seeing schedule related items with more detail and an easy to read layout other than a Gantt chart. It's also a really good way of being able to manage your employee's schedule and be adaptable in a changing environment.
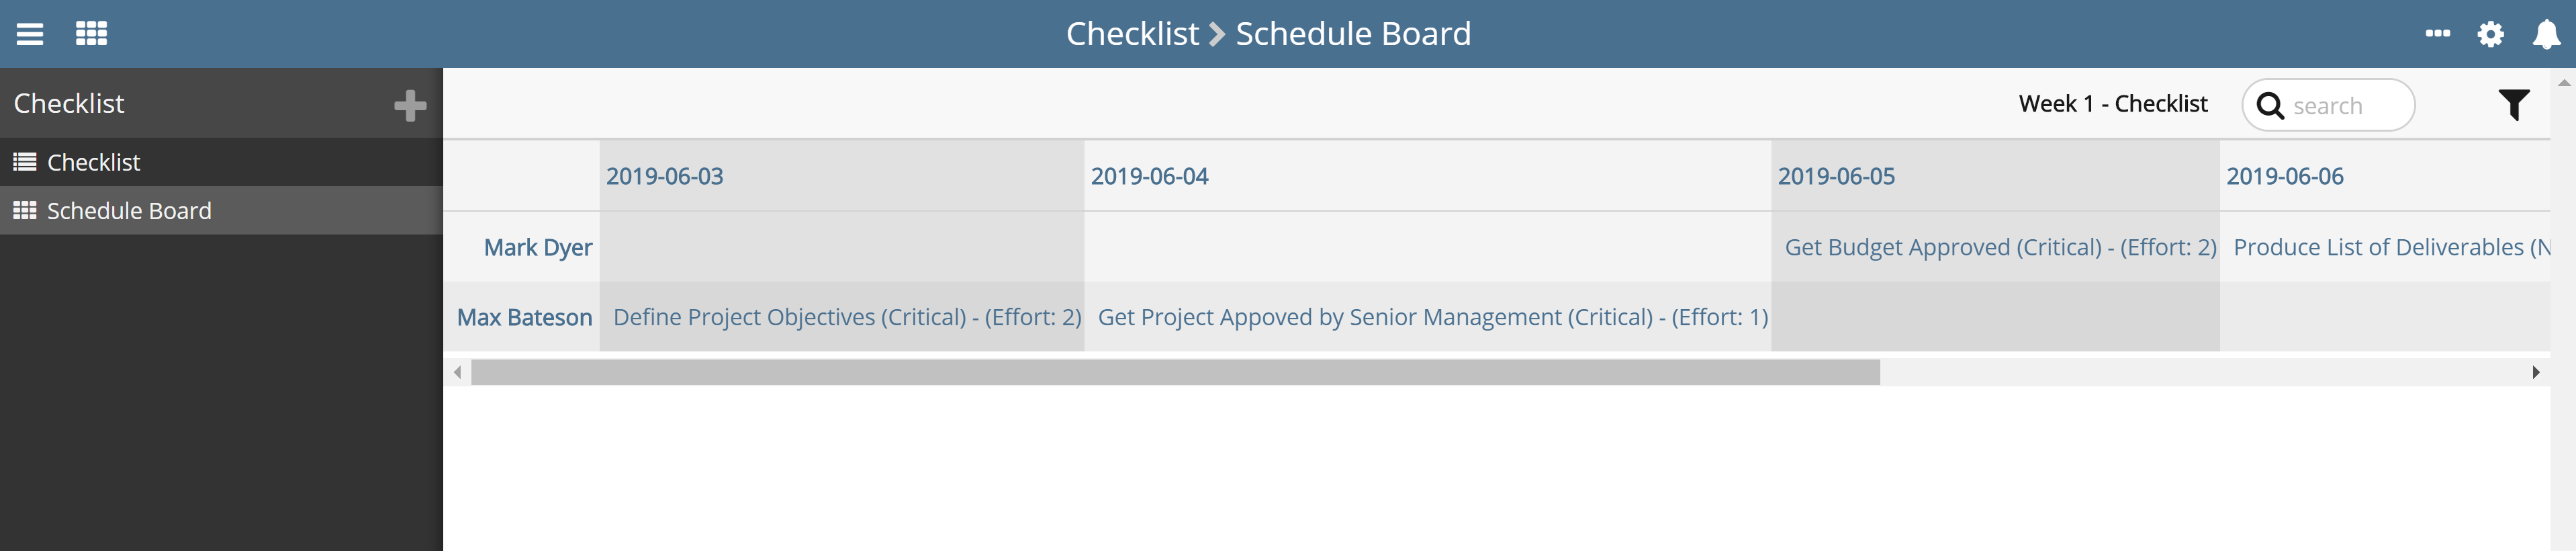
First, you need to decide what fields you want to be seen in this report, my report is for RAID items scheduling so the field will be based on that. The first three are going to be the detail fields and the other two are the x and y values
- Title
- Effort
- Status (Cell colour - V18)
- Date (y)
- Owner (x)
In the configuration, you can only have one field for the detail field, this would normally be the title field of the record but I want a bit more information, so to get past this I used a concatenation field to put these three fields together and use that field. Below is the concatenation I used.
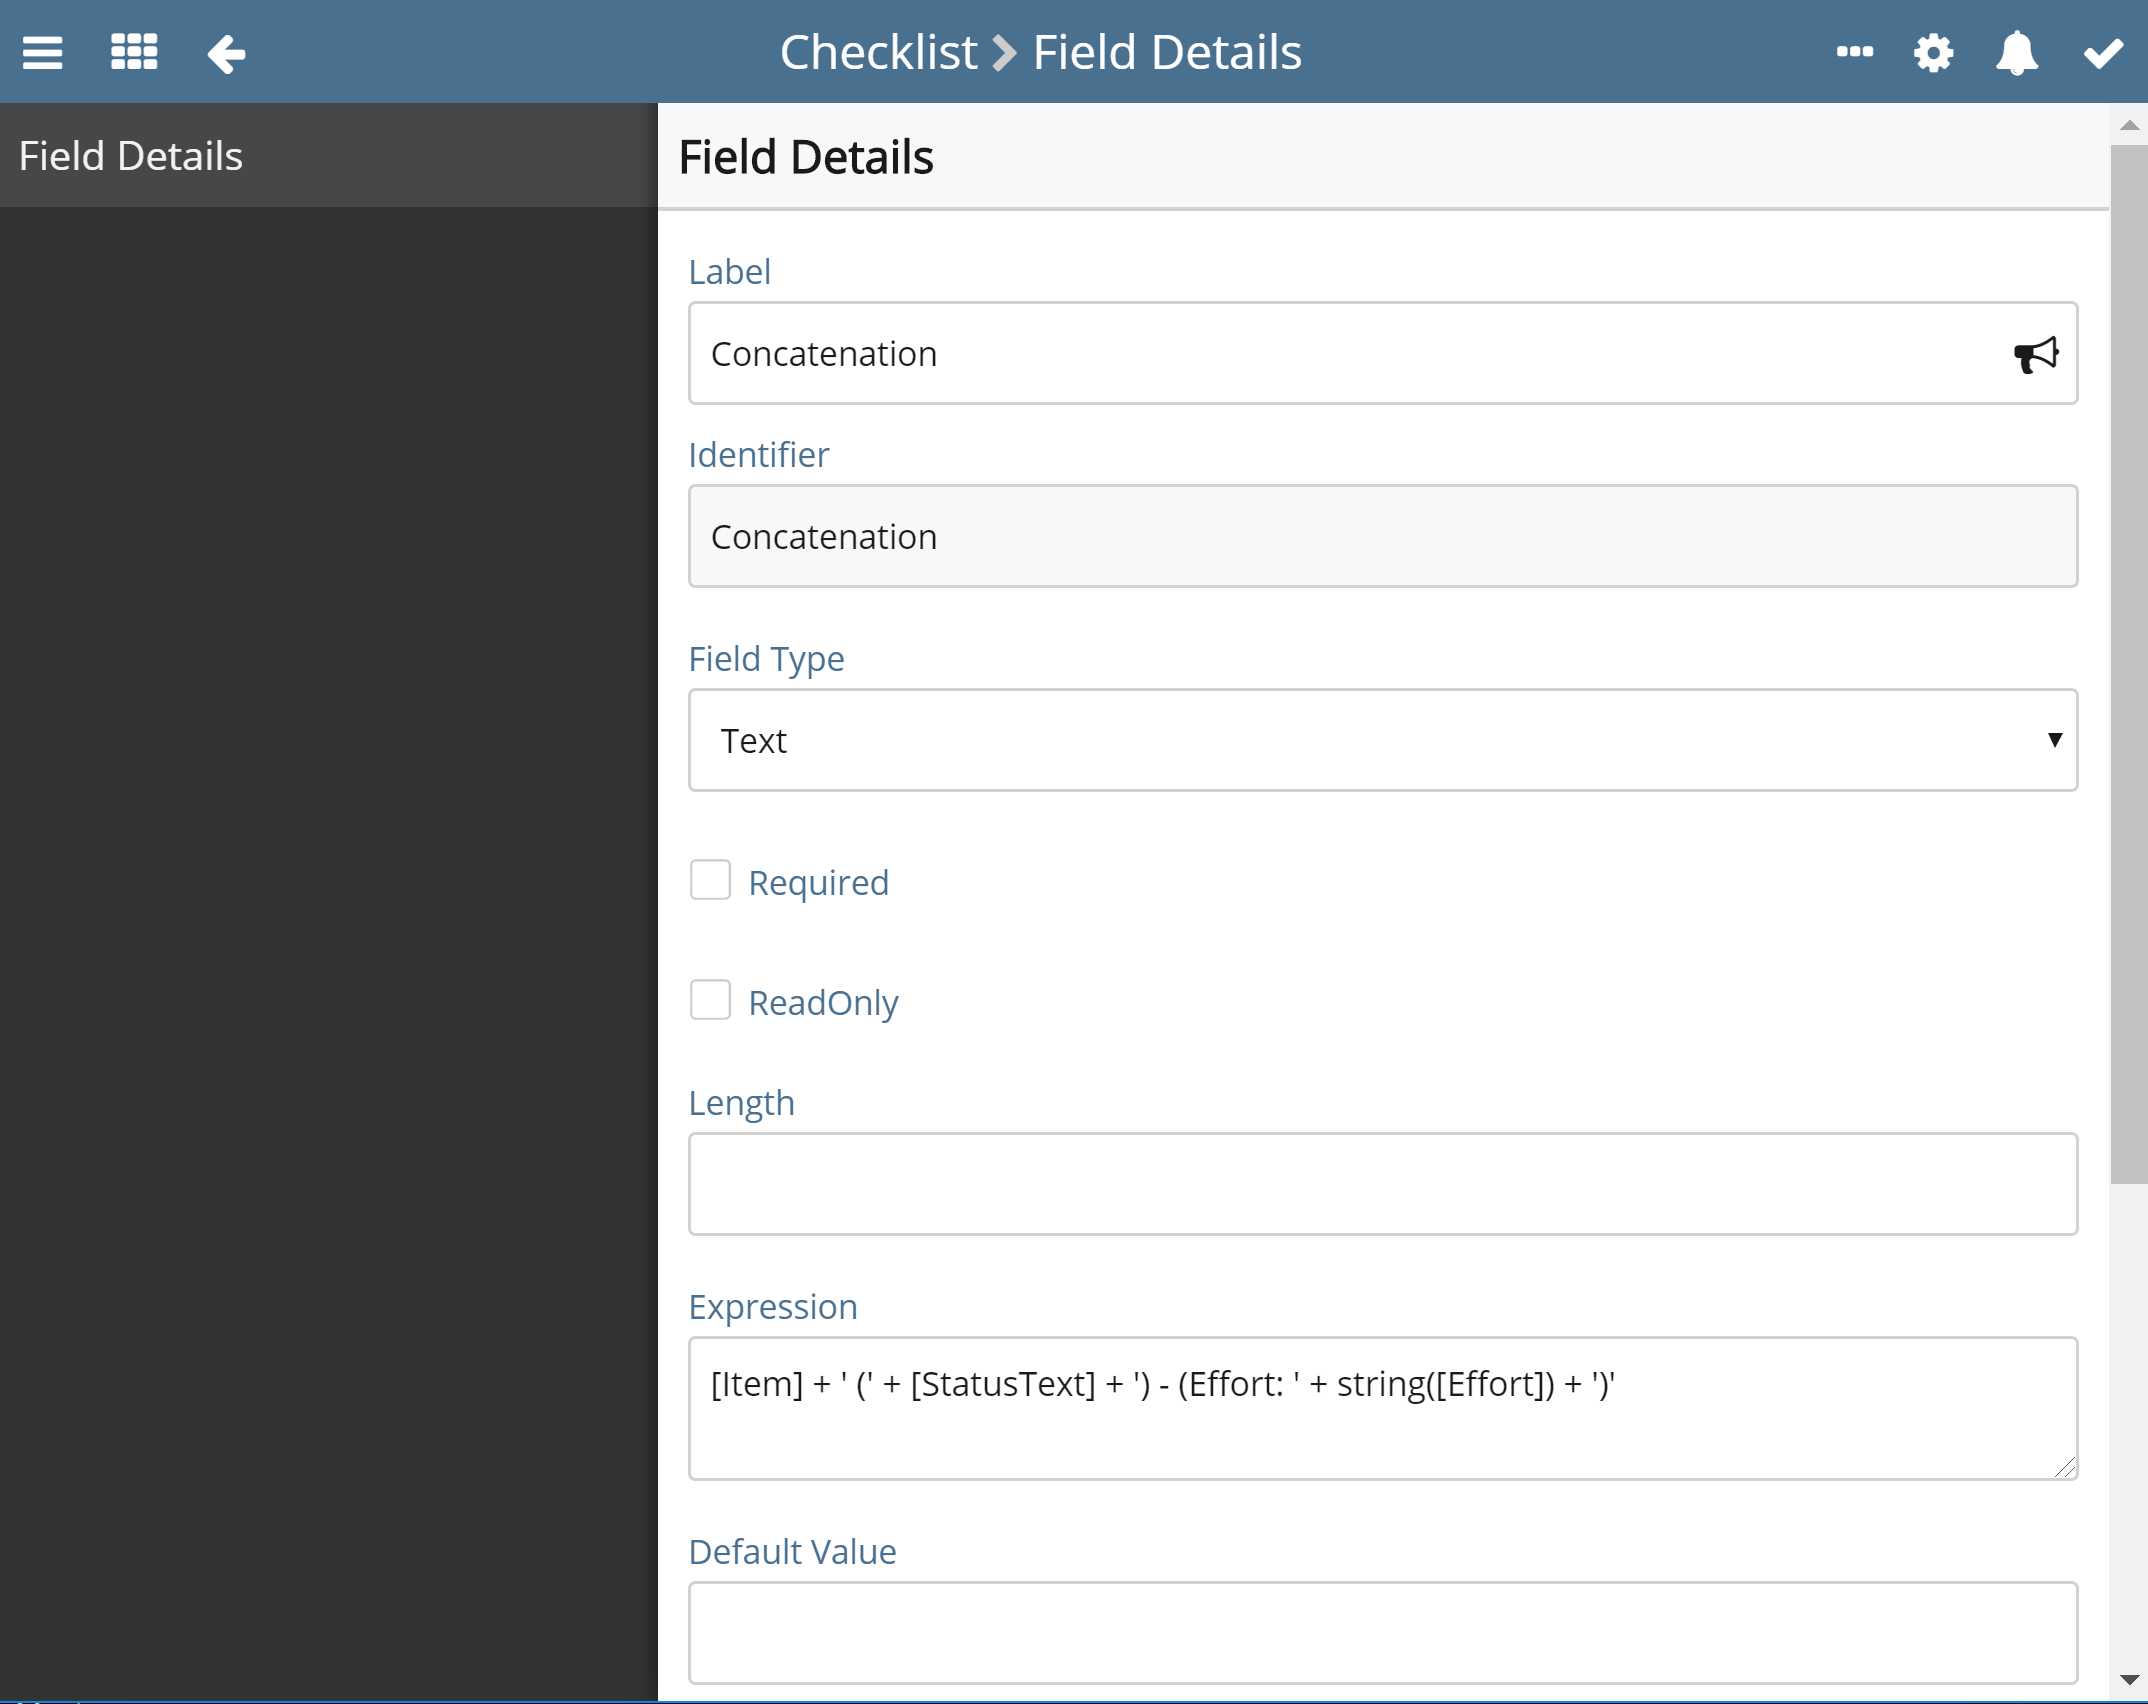
The Item field is the title field, the status text field is the custom text version of the RAG field I added, so converts what each colour means.
If([StatusRAG] = 'Green', 'Done/Ready to Review',
If([StatusRAG] = 'Amber', 'Non Critical',
If([StatusRAG] = 'Red', 'Critical',
If([StatusRAG] = 'Blue', 'On Hold',
If([StatusRAG] = 'Black', 'Done/Ready to Review', 'Unset')))))
Tip - Add this to the template help information so people know what there setting
Tip - When adding the status mulltistate make sure that it has a default value of Unset so that it can be used in base filters
Then I converted the effort into a string as it was a number field and would break the expression trying to add a number and string together. You can have this as a text field to avoid using the string() function but means that manipulating effort for other calculations in the future can be harder.
Tip - formatting will be key for understanding and responsive reading
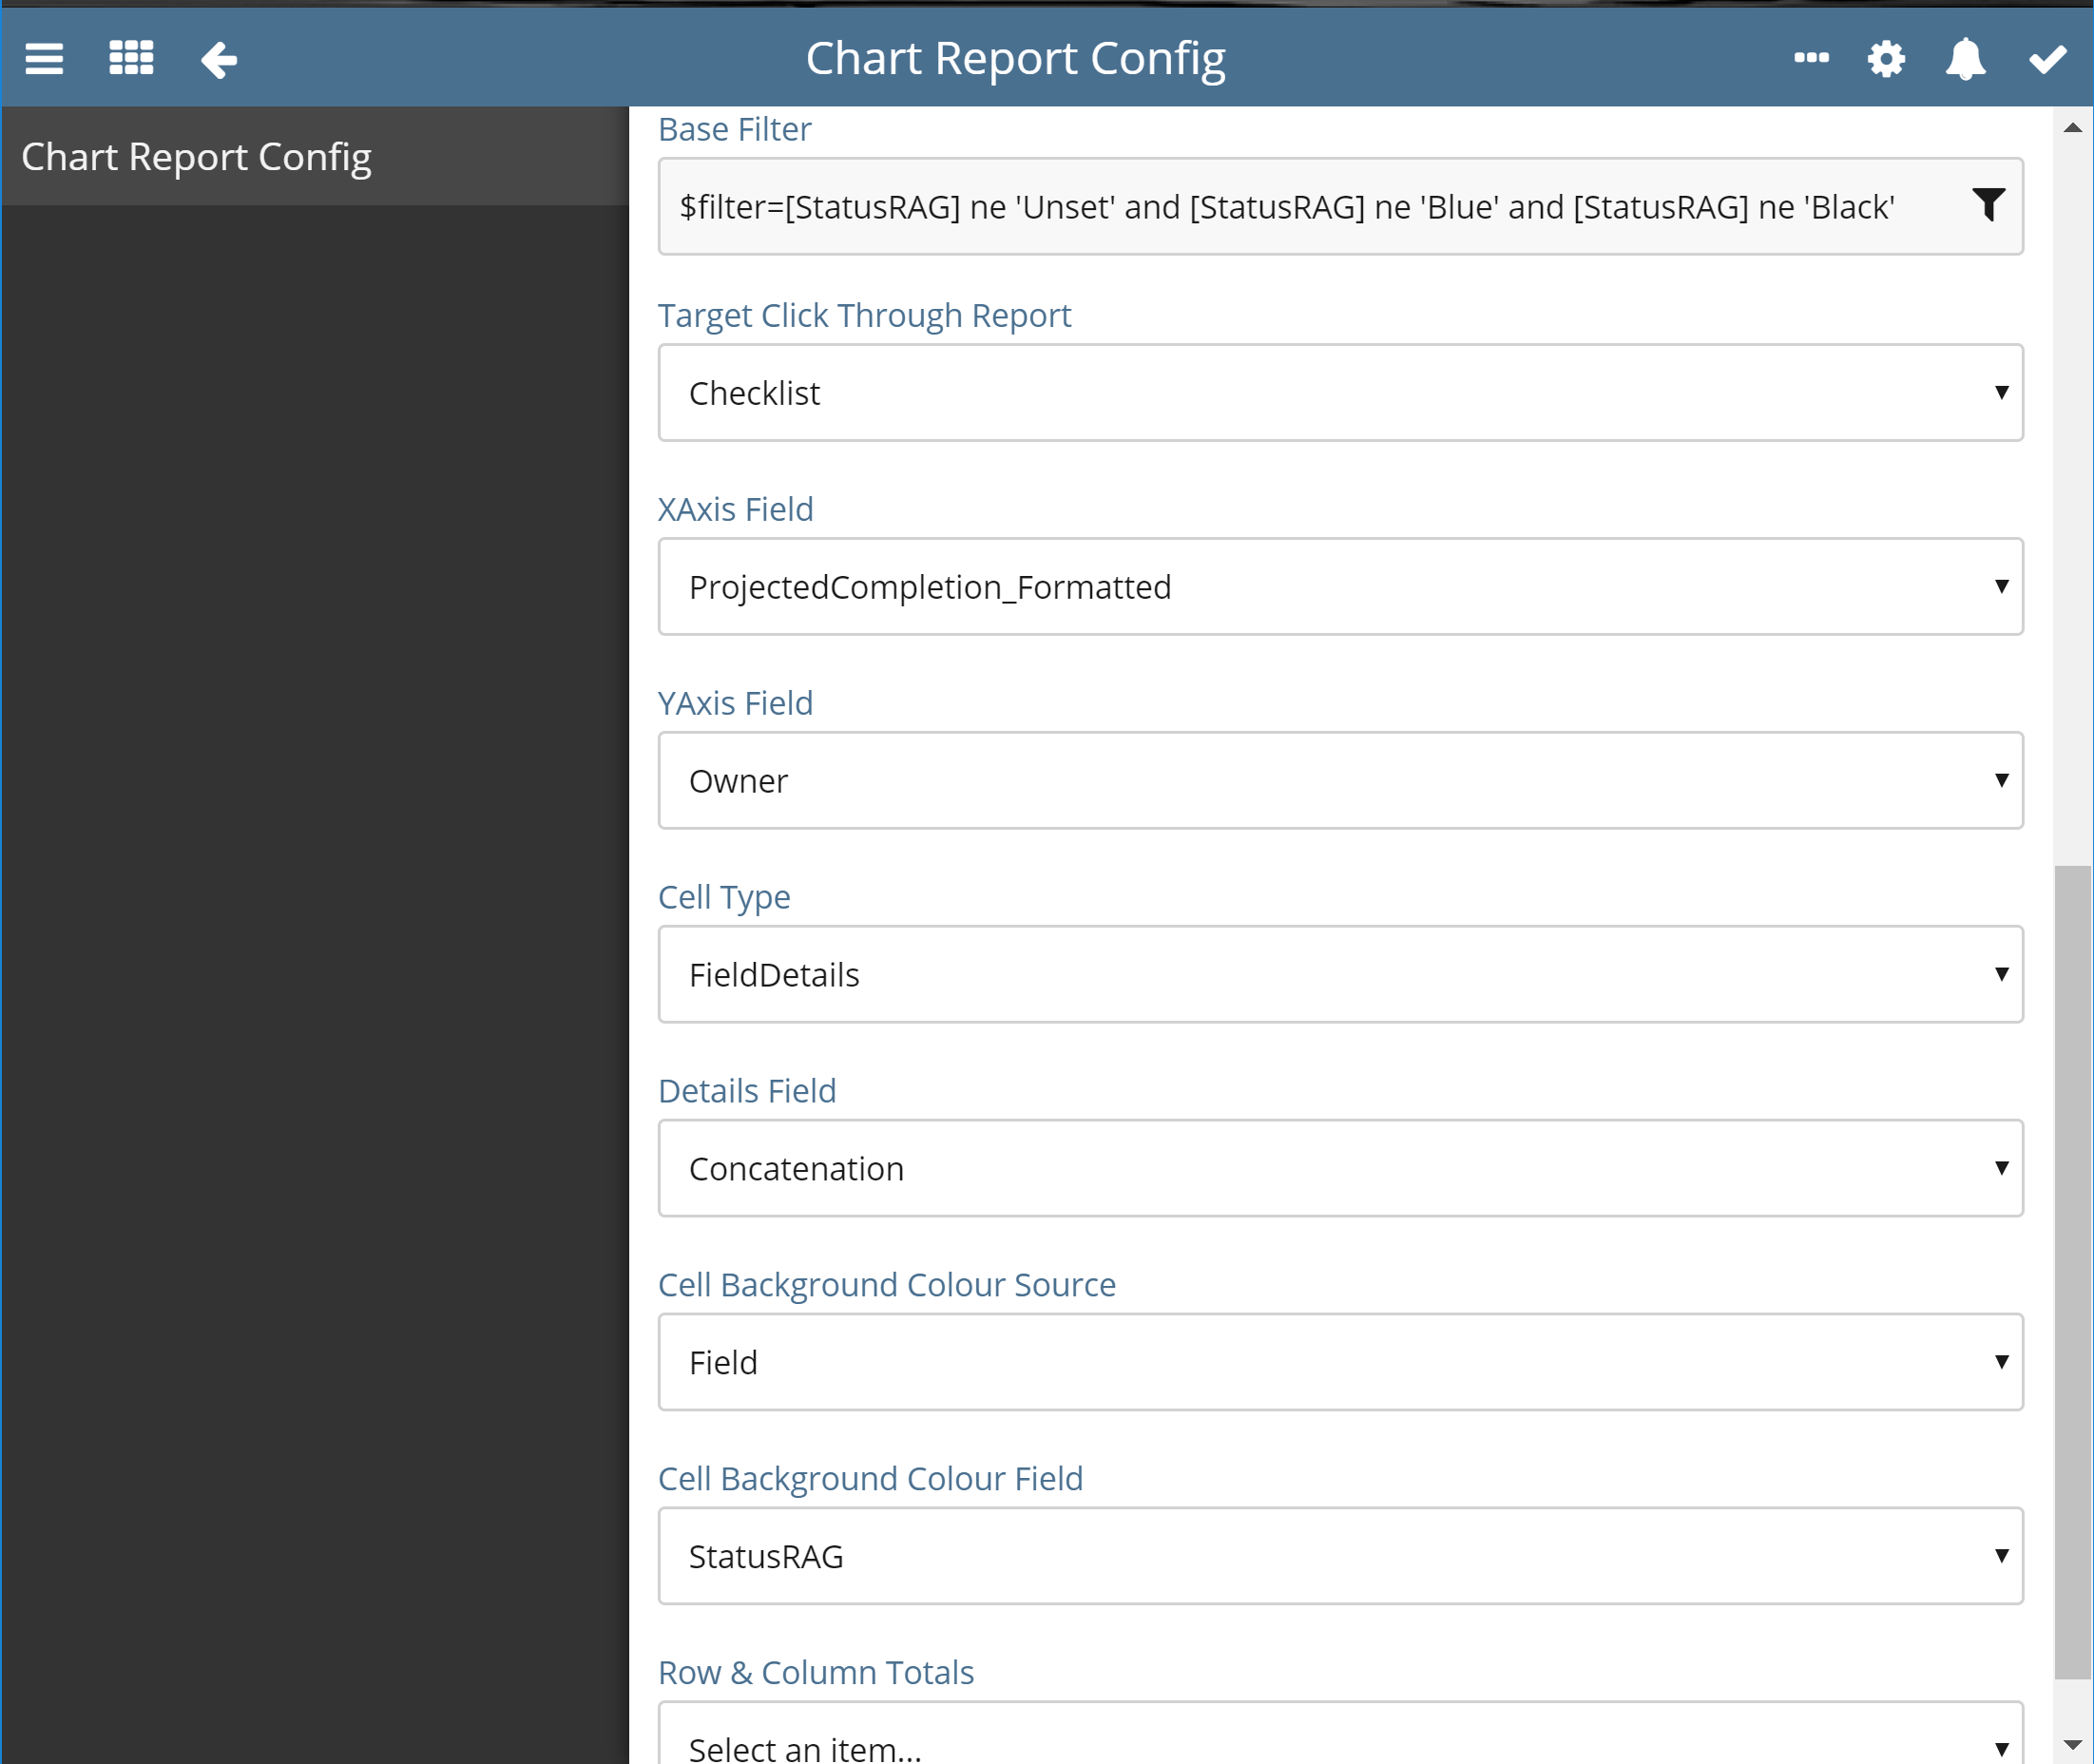
Now we will move onto report configuration, you need to give it an adequate name and identifier then select a matrix report type.
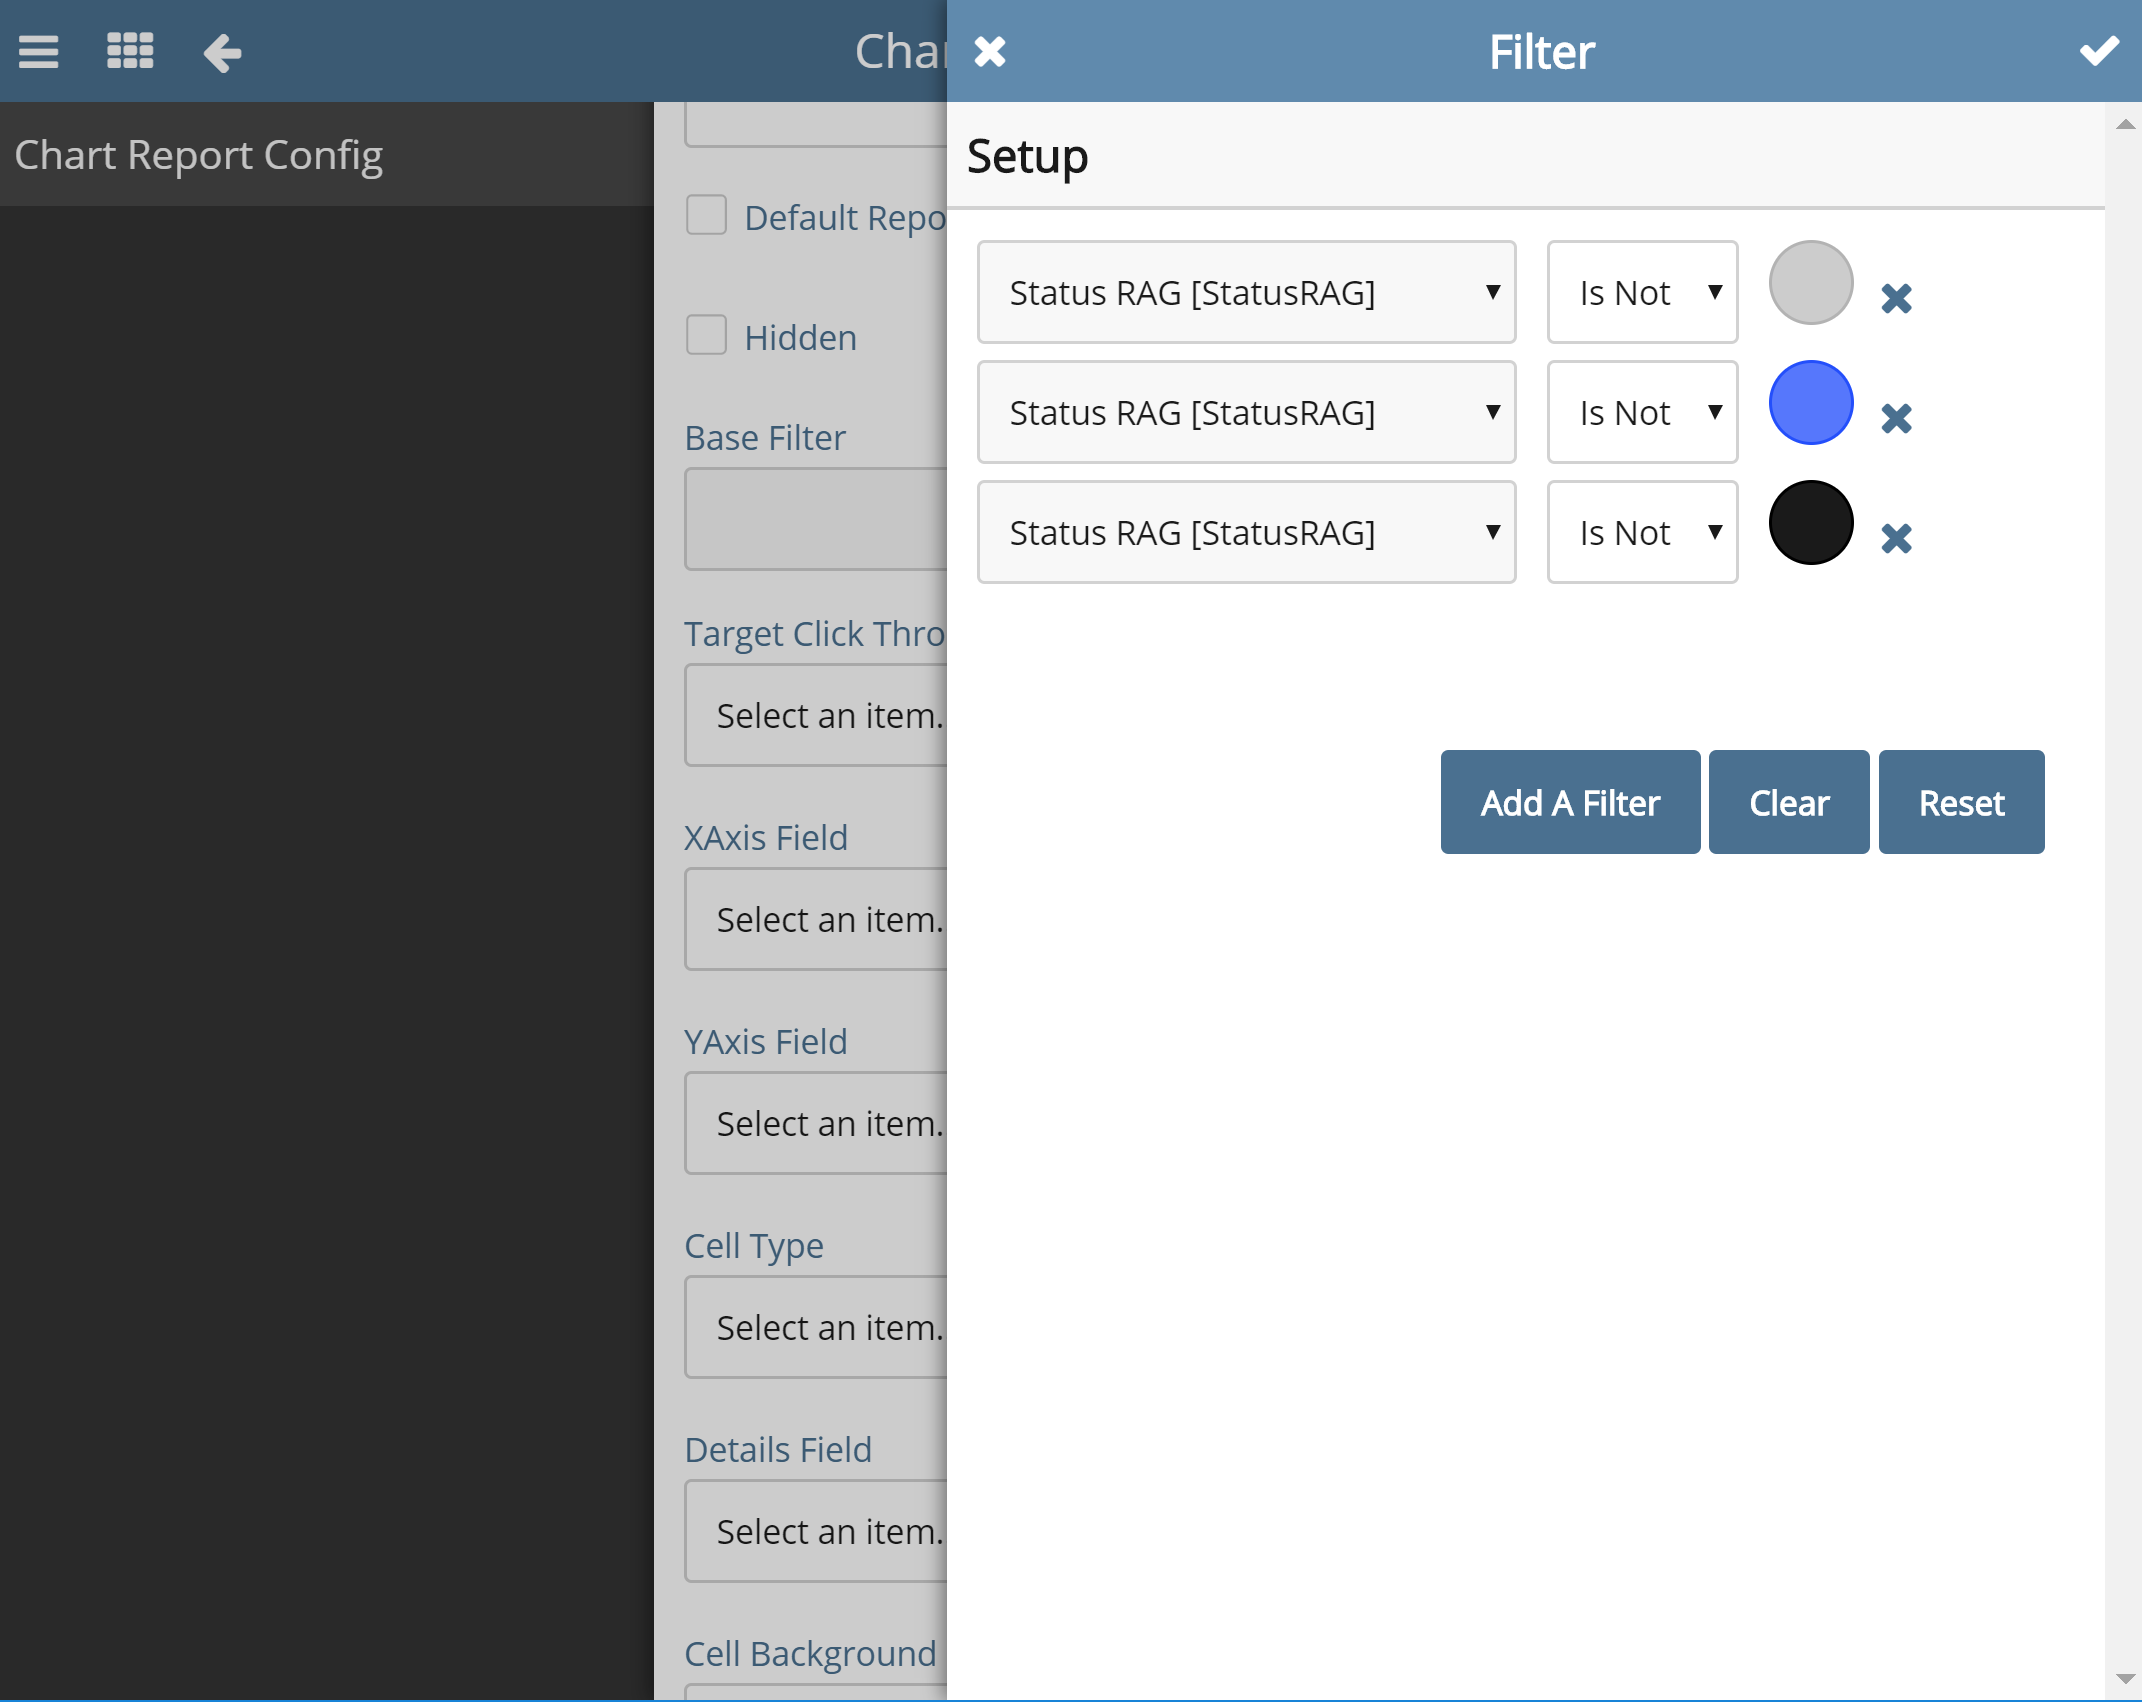
- First I added a based filter, this takes out all unset, blue or black items, this is because I don't believe they would be relevant to this report and would just clutter it up (filter lower down).
- Then I selected the click through to be the default list report, this means that if you click on an Item it takes you straight to record.
- The x axis is the date field, I have given the field a format string, this again can make it easier to read depending on your preference. (https://support.softools.net/hc/en-gb/articles/115001074732-Add-a-Format-String-to-a-Date-or-Number)
- Then I made the y axis the owner field so you can see raid by owner, I used a text field but another field that is good for this is a person field, if you use this make sure to reference its _Text version of the field.
- The cell type needs to be field details, then you need to select the concatenation field.
- Then the cell background source needs to be from a field, then select your status field, this needs to be the multistate field. This is a V18 only feature so will not appear on V14. At the moment this only works well for one cell items and would not advise use on cells that have multiple items in it. We are looking to adapt this to take worst case scenarios in the future
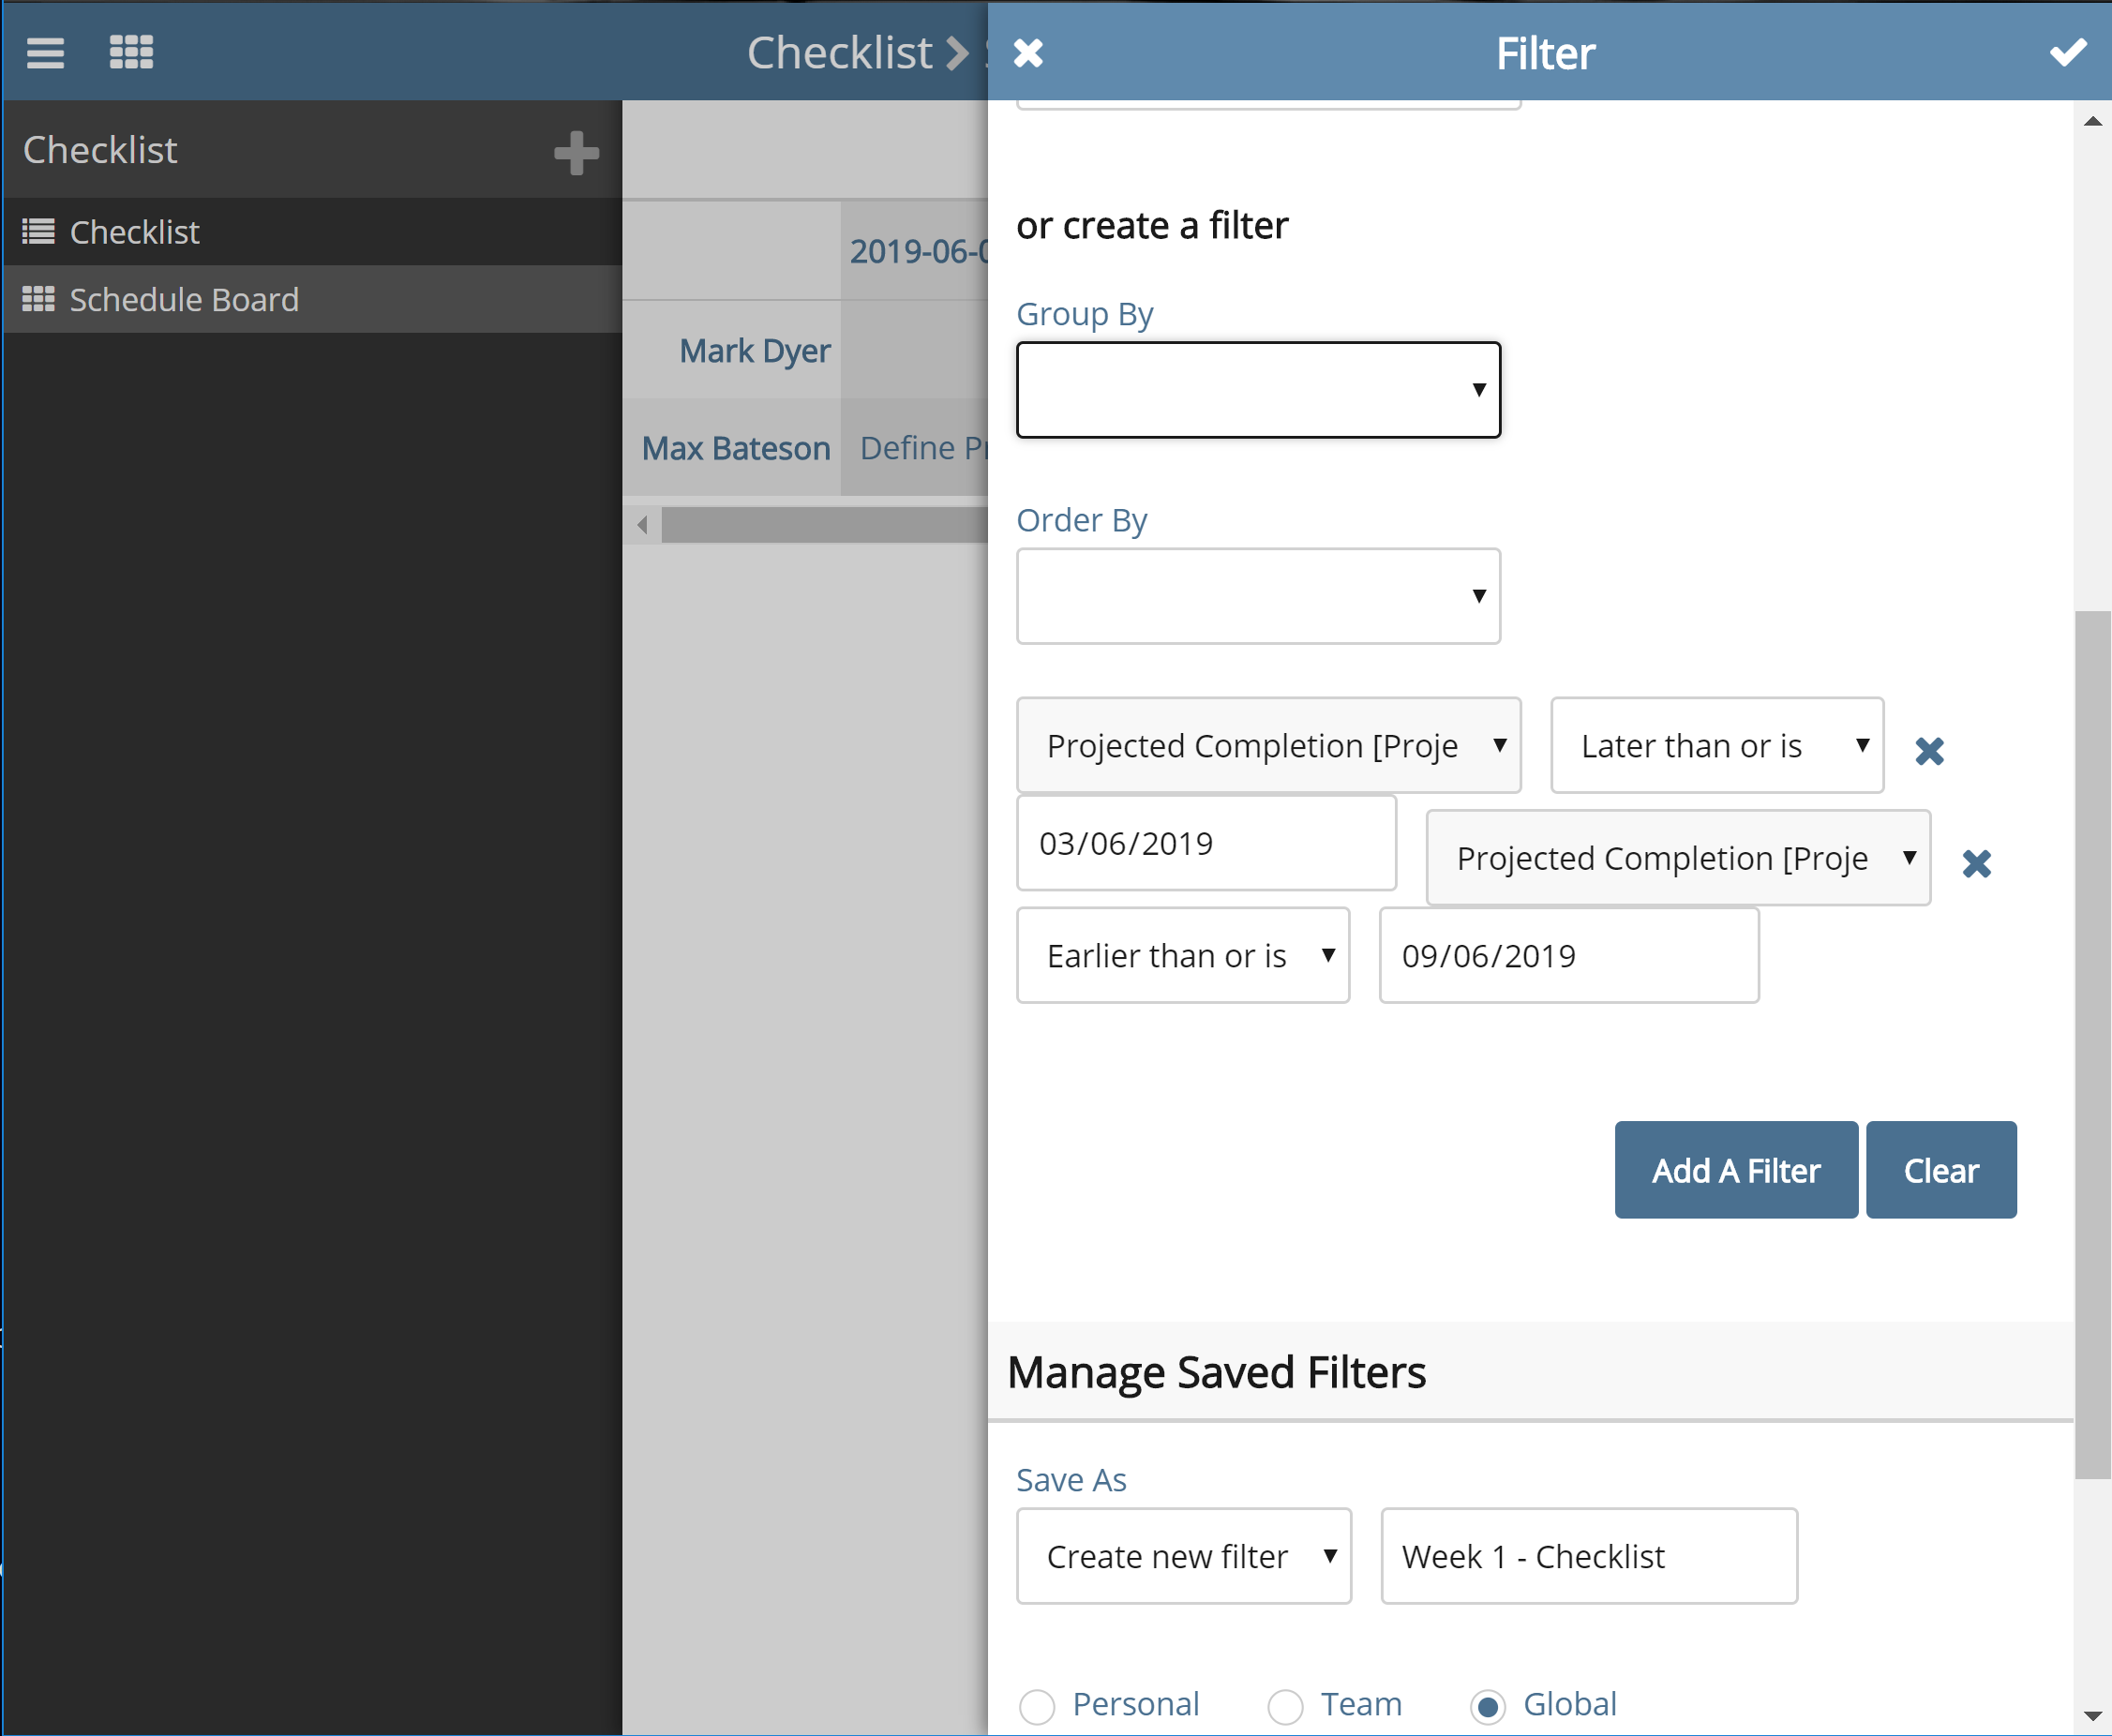
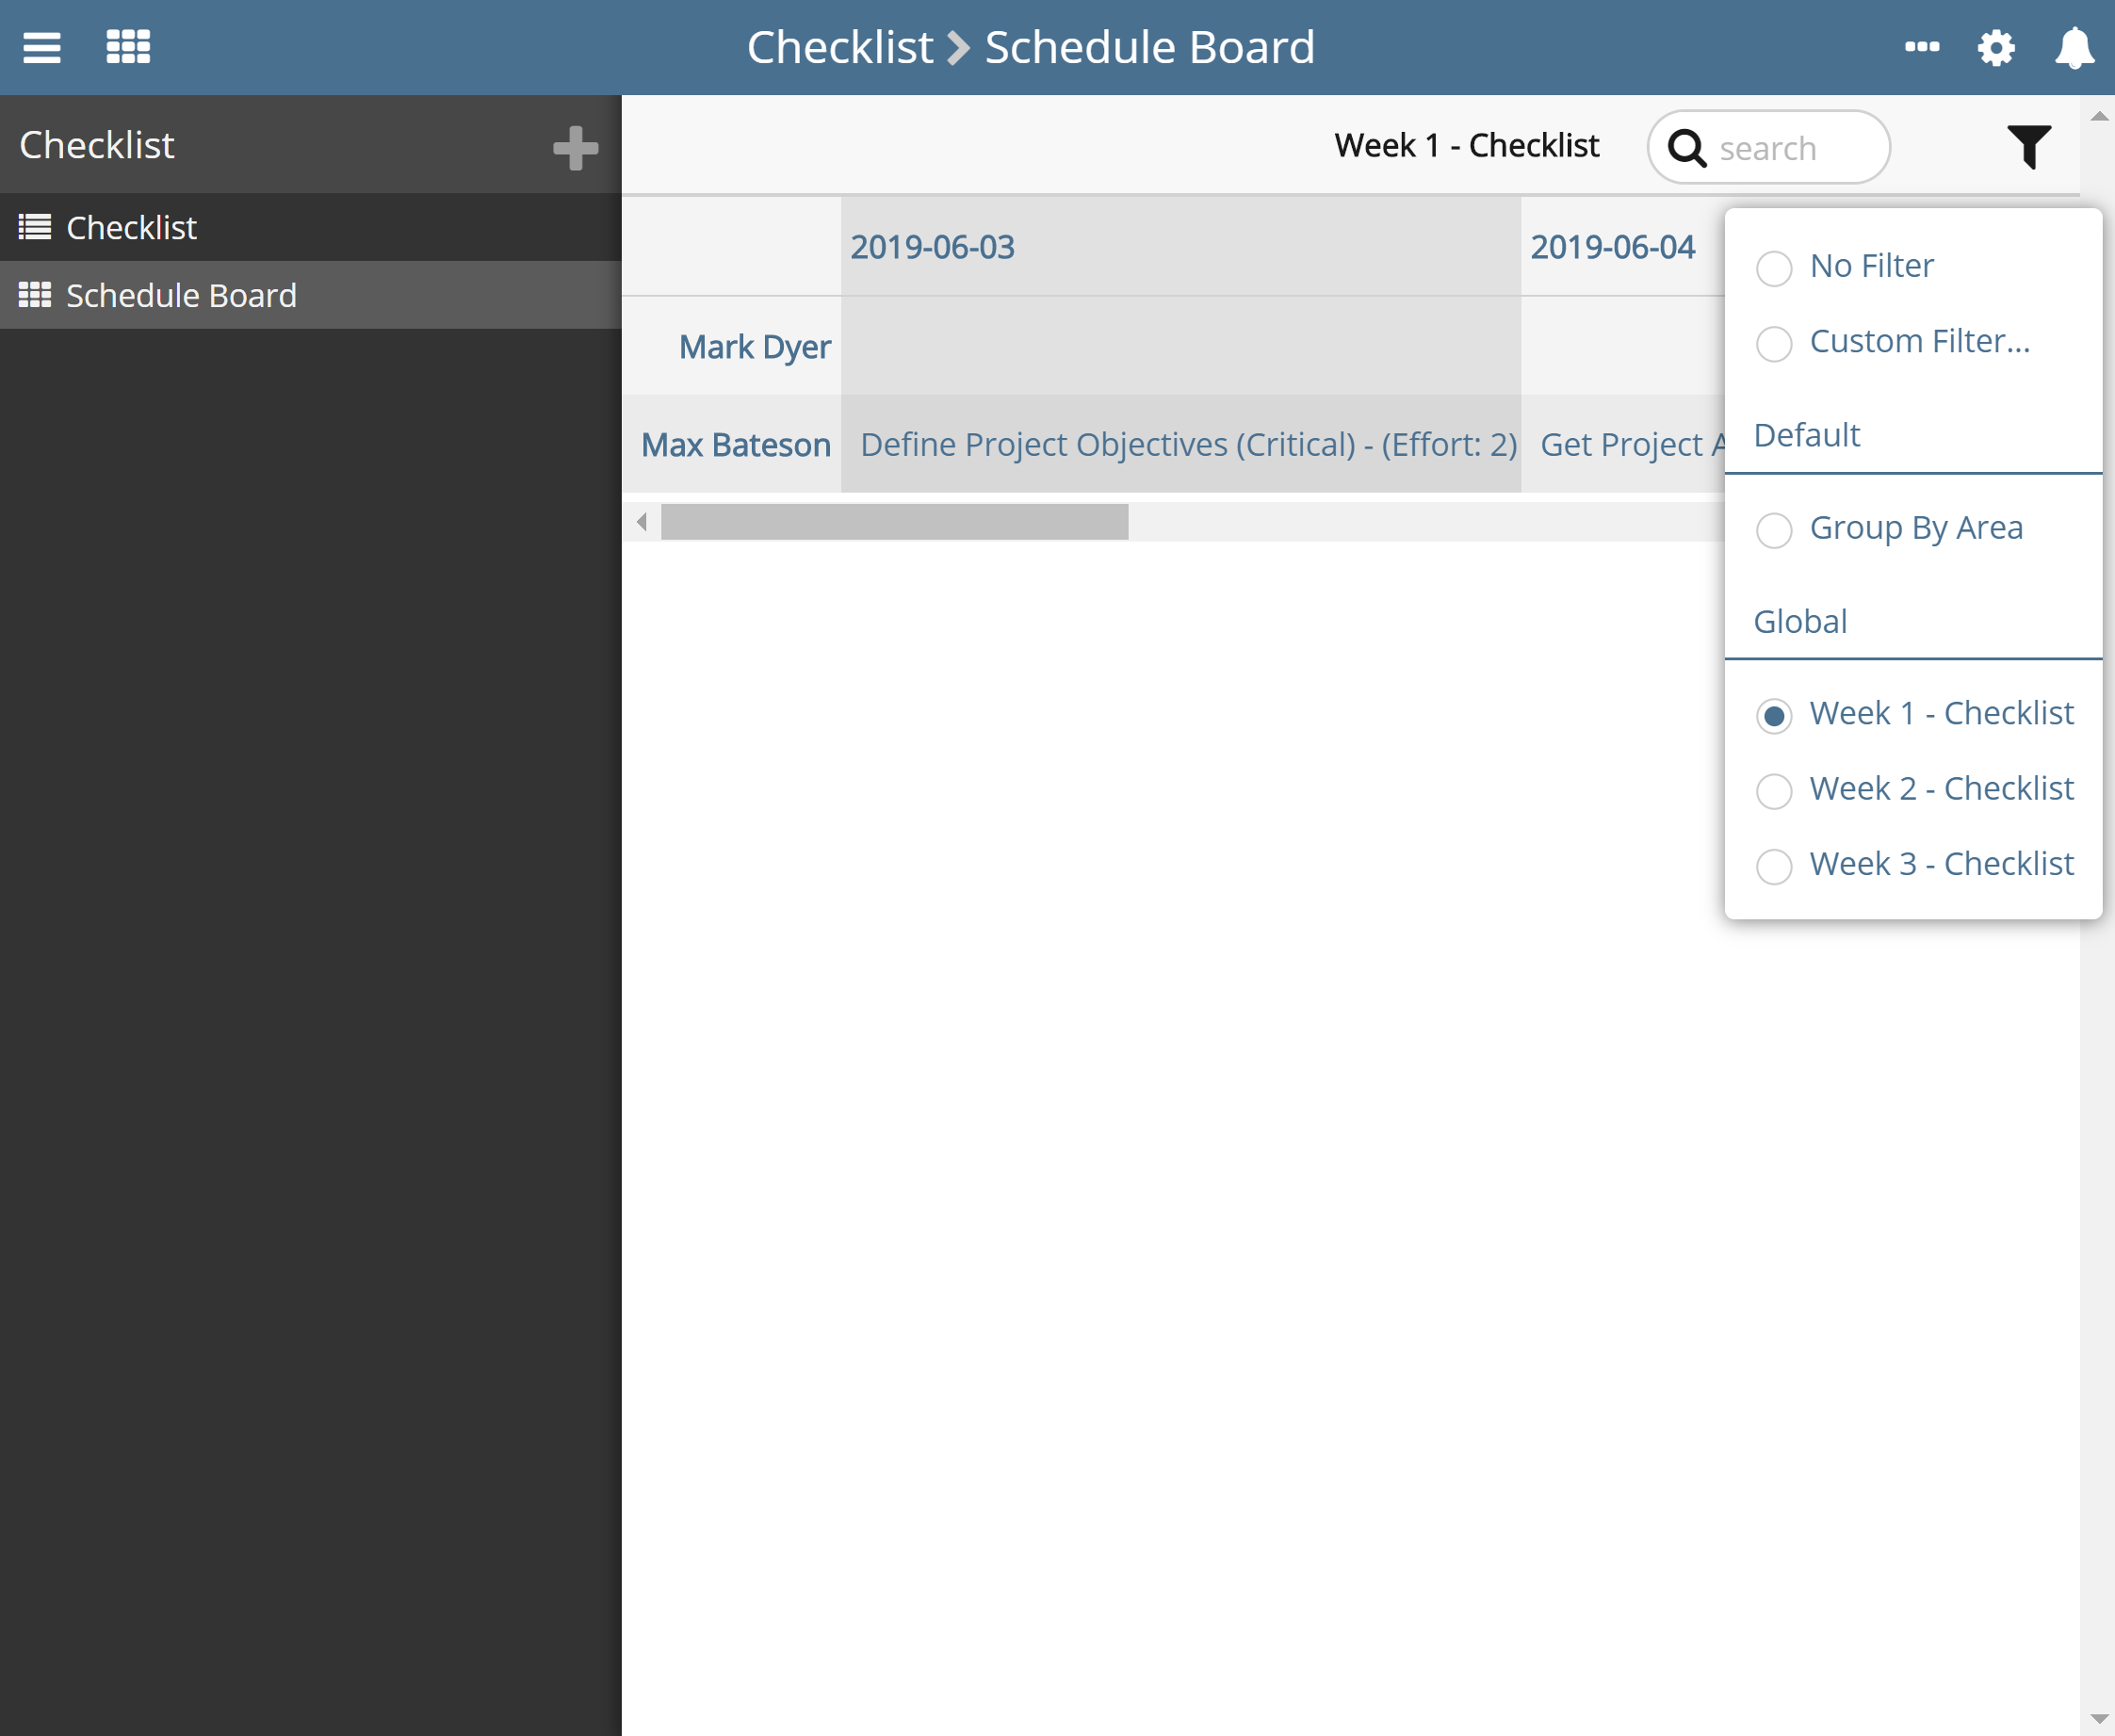
Lastly, once you have your reports I would advise a best practice method of creating filters for each week, so at the start of each week, I would have a filter for the last week, the current week and the next week, this splits the report up and makes it more manageable to use.
Please sign in to leave a comment.
Comments
0 comments