Keep Identifying Columns Visible When Scrolling Across Table Reports

Help users follow the right record with sticky columns that adapt to the space available.
A Staff Register with a 20-point induction checklist gives managers a useful overview of each employee’s progress. In this example, employees are grouped by Team, with their name and Staff ID followed by the induction checks.
But as users scroll across to the later checks, employee names can disappear off the left of the screen. The progress is still visible—but whose progress are they reviewing?
Scrolling back to check a name interrupts the task and makes it easier to lose track of the row. Sticky columns keep employee names visible while users scroll through the checklist.
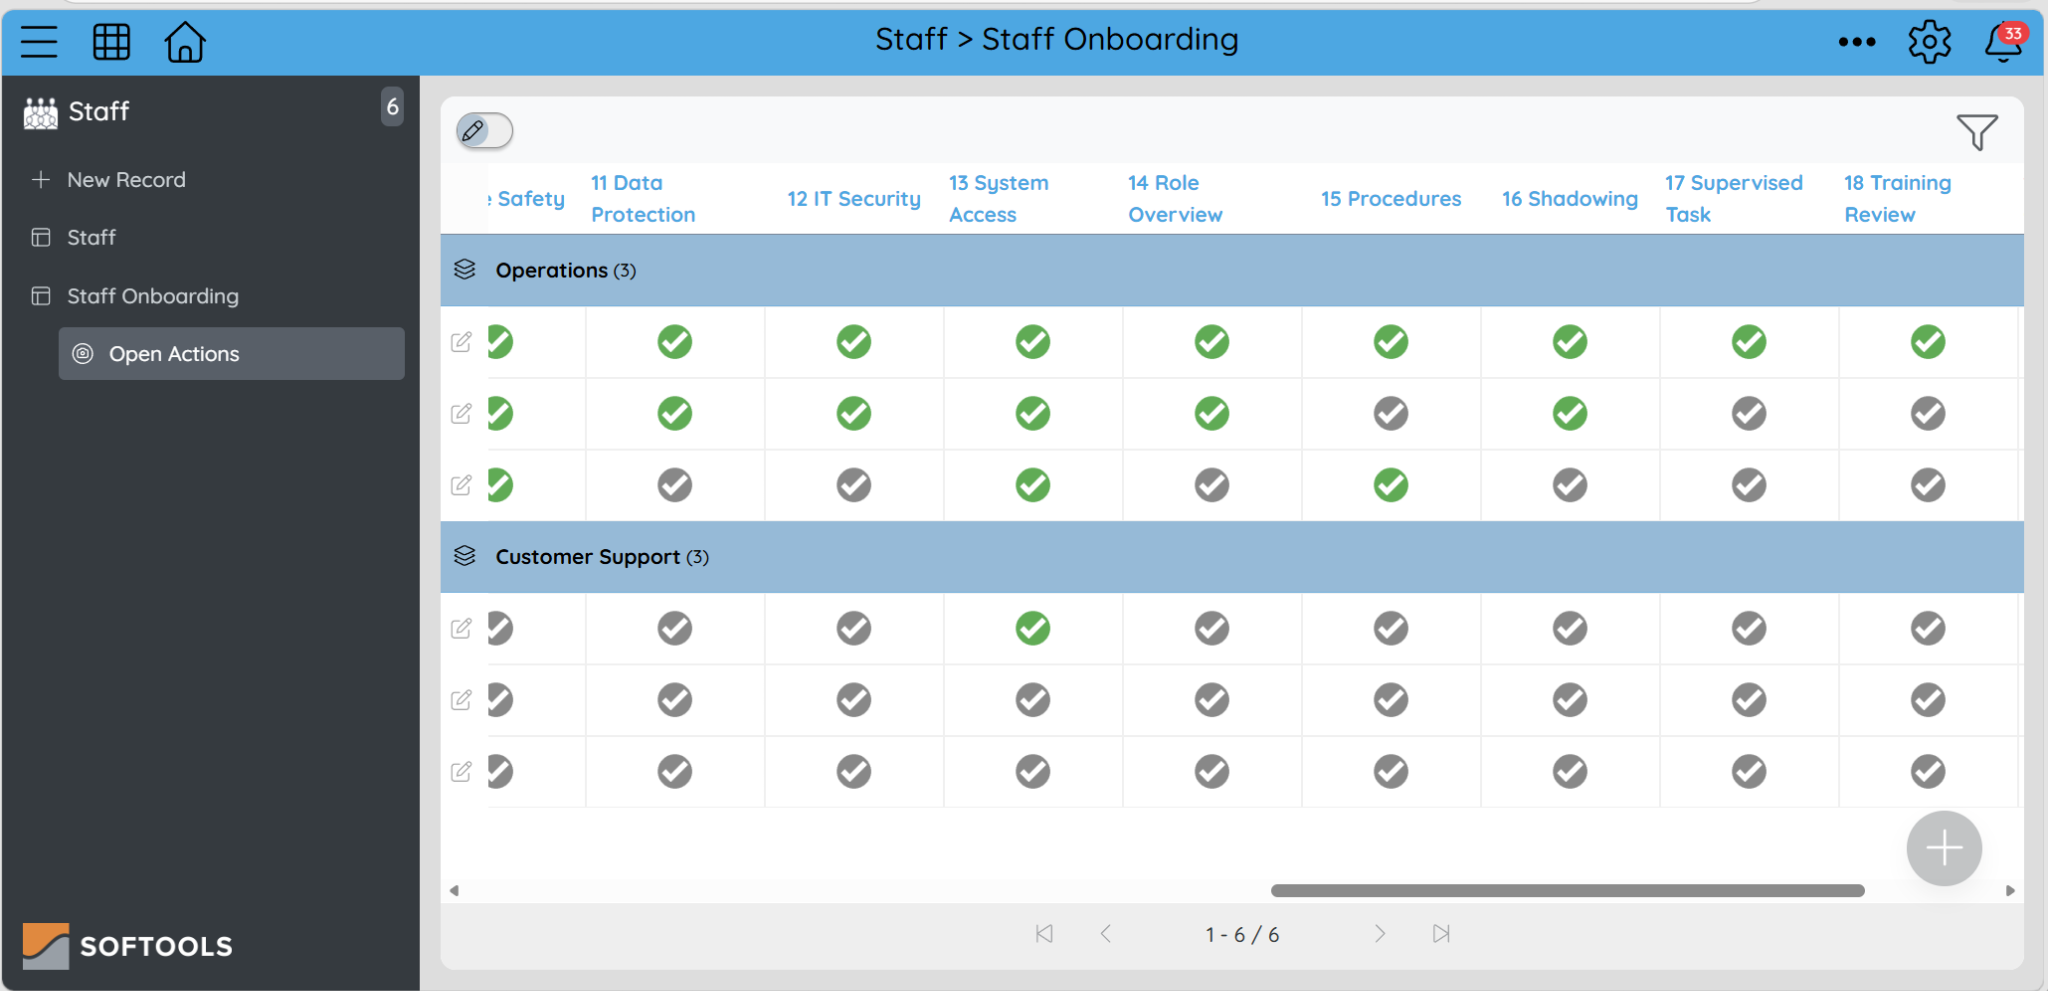
Without sticky columns, users can see induction progress but lose the employee names identifying each row.
By keeping the identifying columns on the left, users can review later checks while still seeing which employee each row belongs to.
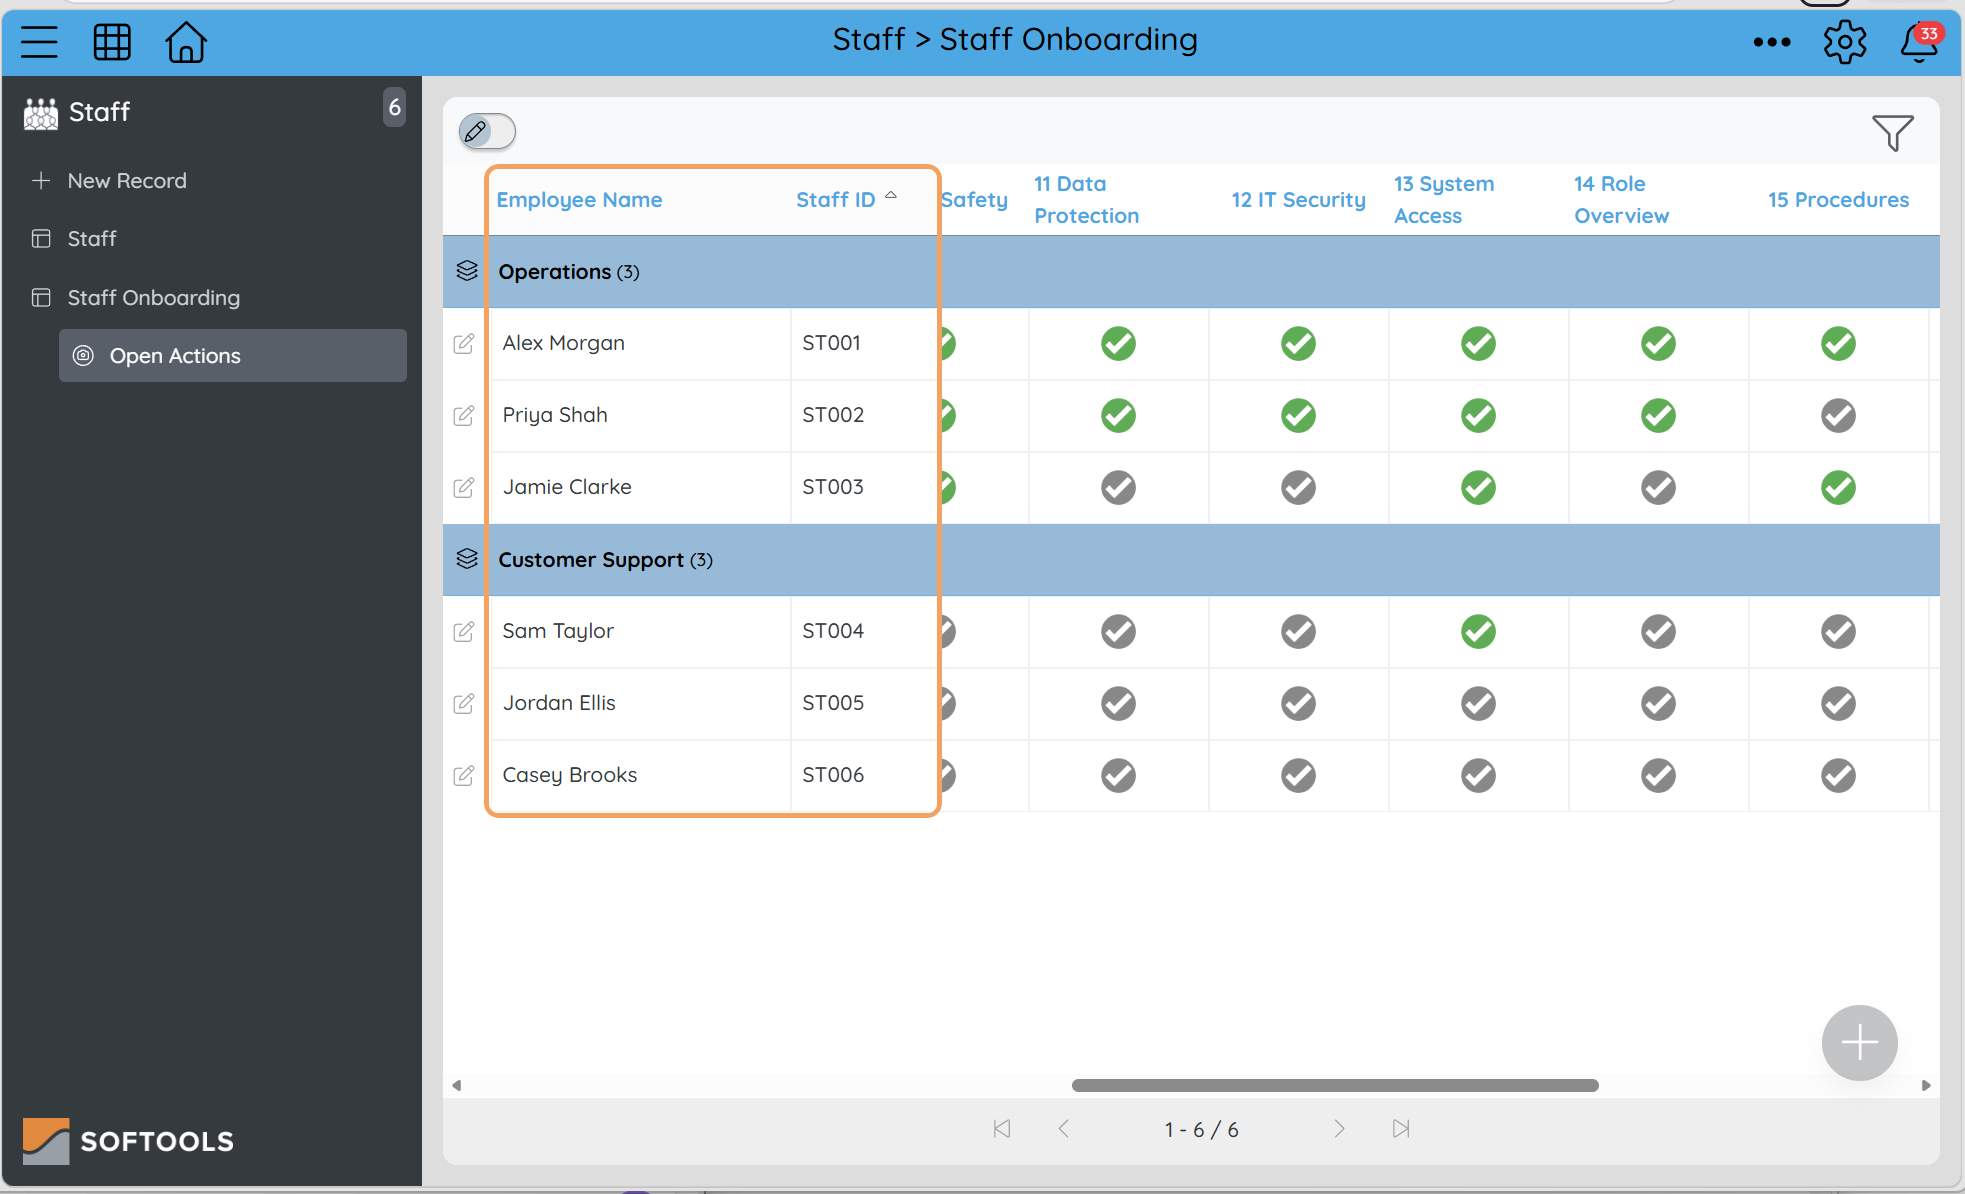
Employee Name and Staff ID remain visible while the checklist scrolls horizontally.
Keep the essential identifier visible
Start with the information users need to recognise the record. In this example, that is Employee Name.
In App Studio:
-
Open the relevant Table Report.
-
In Report Fields, place Employee Name first, followed by Staff ID and the checklist fields.
-
Edit the Employee Name Report Field.
-
Under Sticky Configuration, enable Always Sticky.
-
Save your changes and test the report in Workspace.
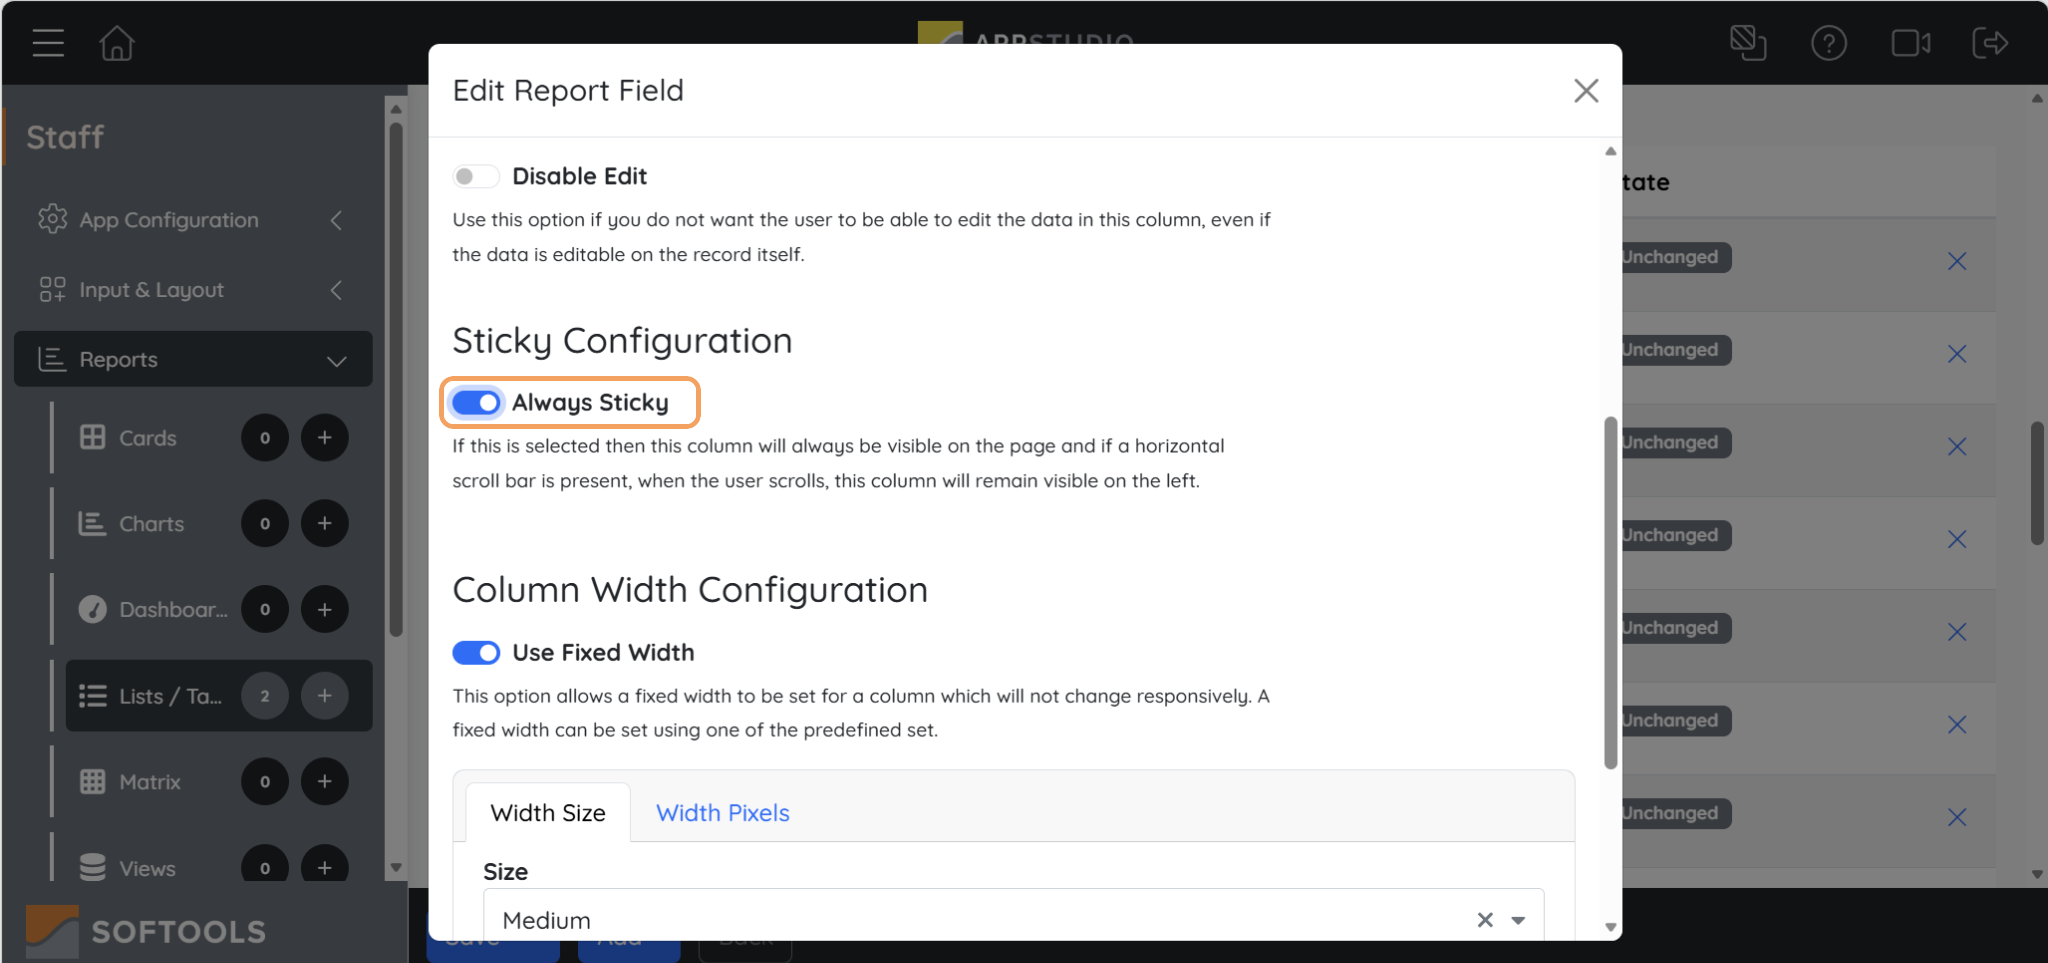
Enable Always Sticky for the identifying column that should remain visible during horizontal scrolling.
Configure sticky columns as a consecutive block starting from the left of the report.
Make additional sticky columns responsive
An additional identifier can be helpful on a wider screen, but it also takes space away from the information users are reviewing.
In this example, Employee Name always stays sticky, while Staff ID is sticky only when there is enough width.
For the Staff ID Report Field:
-
Leave Always Sticky disabled.
-
Enter 900 in Sticky Width Pixels.
-
Save your changes and test at wider and narrower widths.
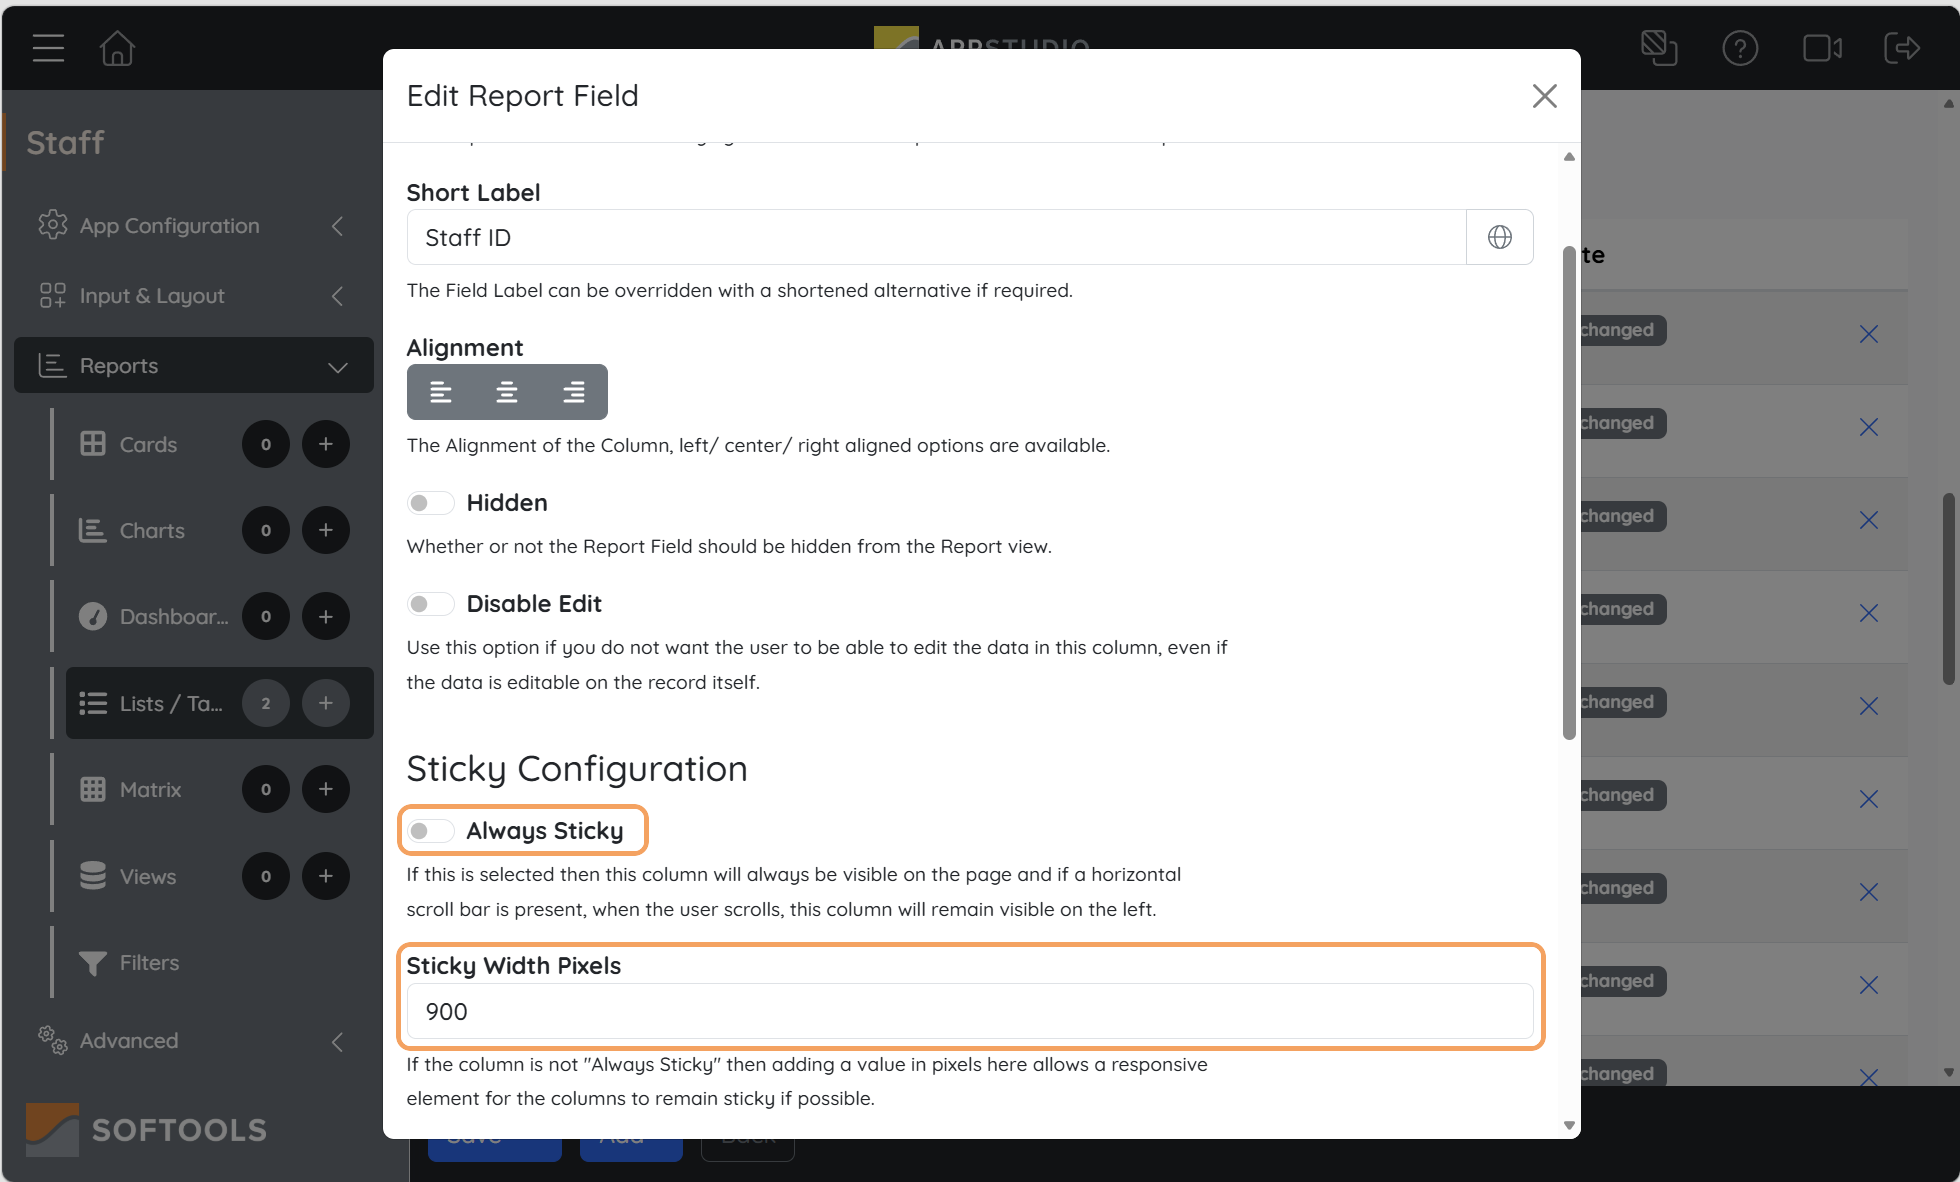
Staff ID uses Sticky Width Pixels rather than Always Sticky, with 900 as the value for this example.
With this configuration, Staff ID remains sticky in the wider view. In the narrower view, it scrolls away with the checklist, while Employee Name remains visible.
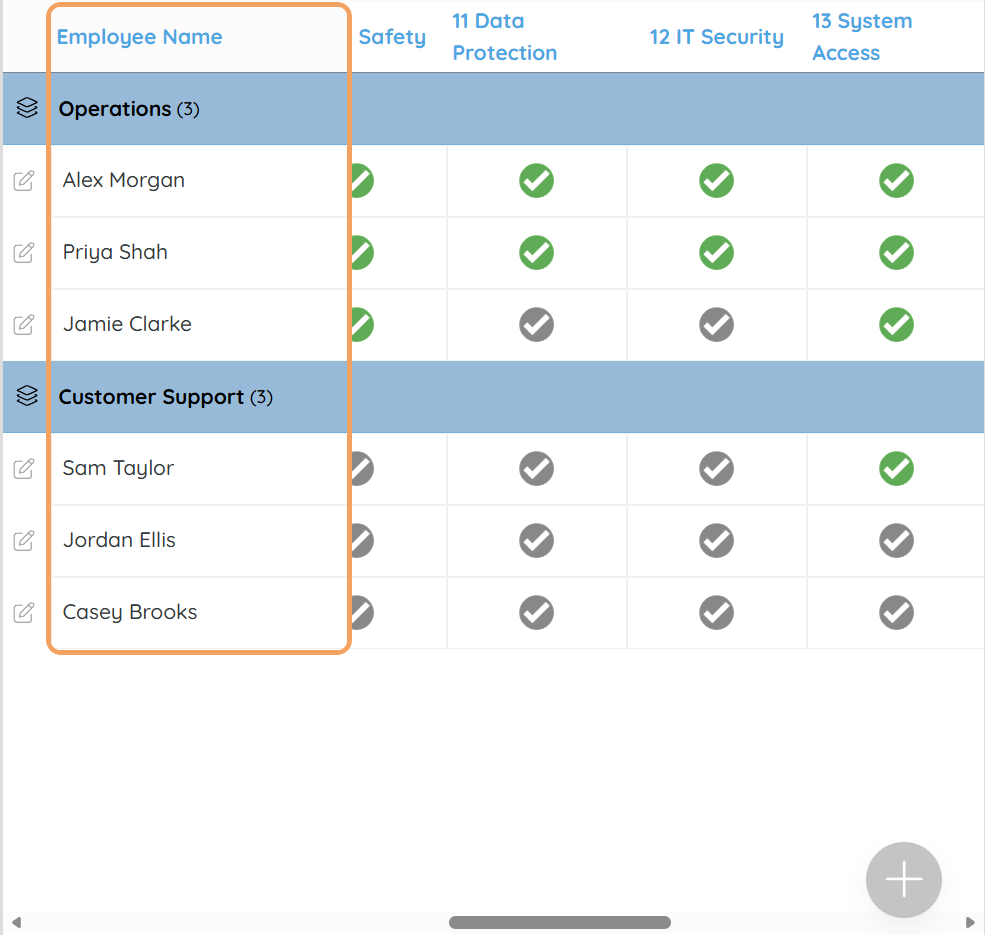
On a narrower screen, only Employee Name remains sticky, leaving more room for checklist details.
Sticky Width Pixels controls responsive stickiness; it does not set the column’s display width. Treat 900 as a starting point for this example, then test and adjust the value for your report.
Useful beyond very wide tables
This is particularly helpful for wide reports where horizontal scrolling is unavoidable, such as the 20-point induction checklist.
It also helps with reports that fit comfortably on a desktop but require scrolling on a tablet or landscape mobile screen. Users retain the context of each row as the available space changes.
Keep the frozen area compact
Freeze only the one or two identifying columns users need, and keep their widths practical. Too many sticky columns can leave little room for the details—especially on smaller screens.
For other Apps, the identifying information might be a Project Name, Asset ID or Action Title. Choose the information that lets users recognise the record immediately.
For more configuration guidance, see the Table Report support article.
Please sign in to leave a comment.
Comments
0 comments