Change Management for Master Content

In this post I will be showing how we implemented a change management template for general or master content that you want to keep track of changes on and keep quality control as a high priority. For an example of master content being used please click here. The example below is what we use to manage changes to content of our abc course, this area is for members to request and action changes to the content making sure the changes are made properly and tracked correctly. For more on abc please click here
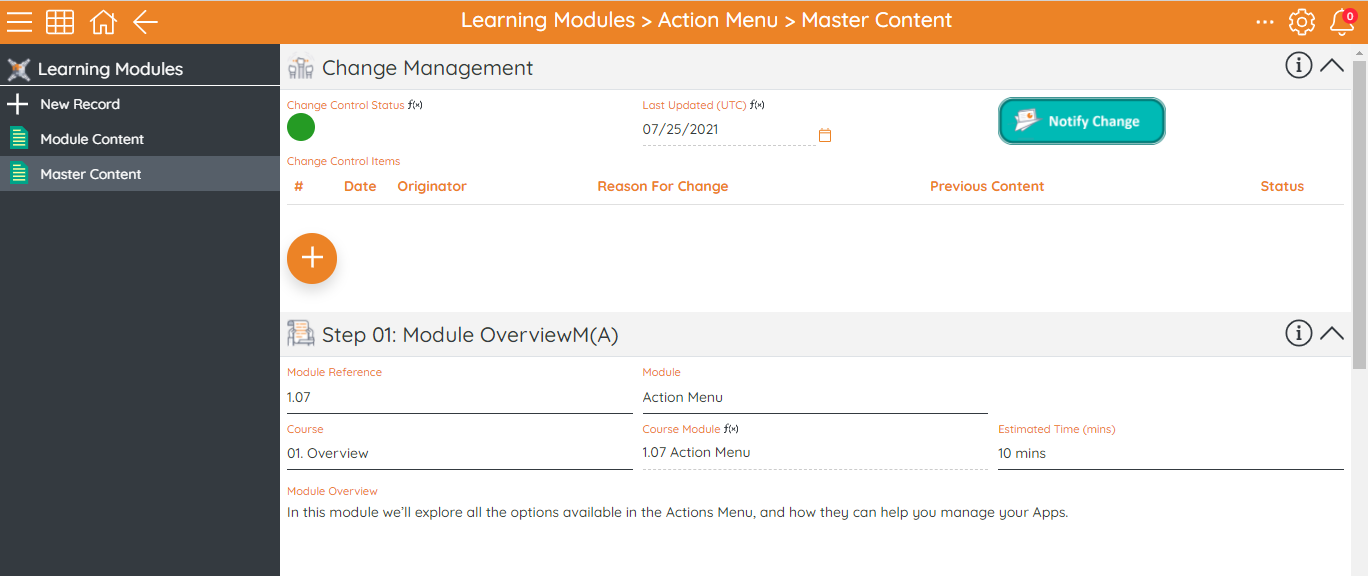
First step we took was to create a list field you see on the second row of the template above named 'Change Management', for more on list fields please click here. This field is where the data of the changes to the module are stored and ready to be looked at, it has six columns:
- # - a text field to track what change number it is
- Date - a Date field to track the date the item was requested / actioned
- Originator - a person field to track who requested the change
- Reason for change - a long text field that has why the change needs to be made
- Previous Content - a long text field to track what the change was and what it is now incase it needs to be reverted
- Status - a multi-state field to track the progress of the change, Red = New Request / Amber = A change has been made and is ready to review / Green = The change has been made . if you use a RAGBB multi-state then you can also have Blue = The change is on-hold / Black = The change is closed
Once this field is created you can then start to add in the 'Change Control Status' field, this is a multi-state field type with a list field expression that pulls out the priority status of the changes logged in the list field. The logic of the field is that if there is a status amber in the list field then the record is amber, then it goes red, then unset and then green. The expression in the field is made of a list field expression which is a more advanced expression type, if you want to know more please click here. The expression we used is below:
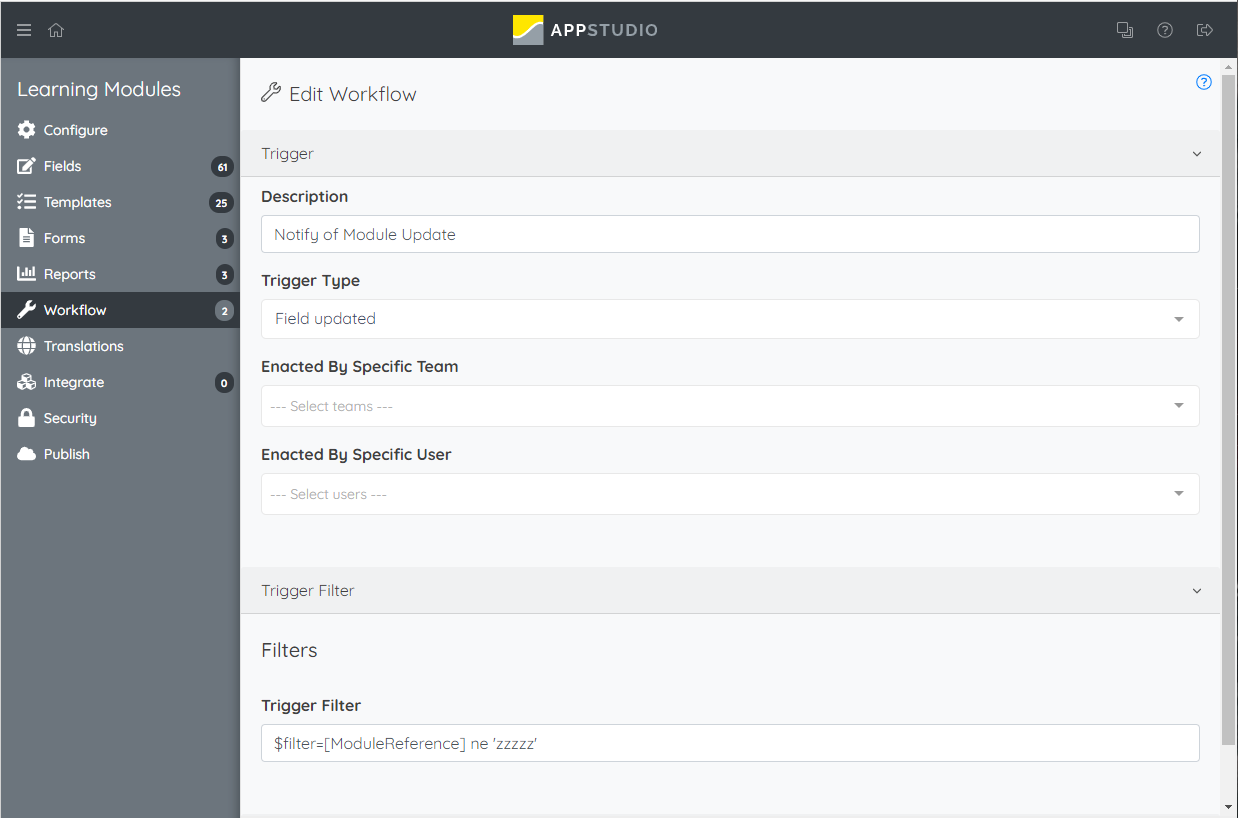
The last field to add in the image action button to notify the person in charge of managing the content that a change has been made or requested. This will require you to create a workflow item that notifies a user when the button is actioned. Below is how we I configured the workflow, the key points are that:
- The trigger needs to be on field update
- The filter has to be a filter that will never be met (Otherwise instead of it triggering on the press of the action button it will trigger on the filter)
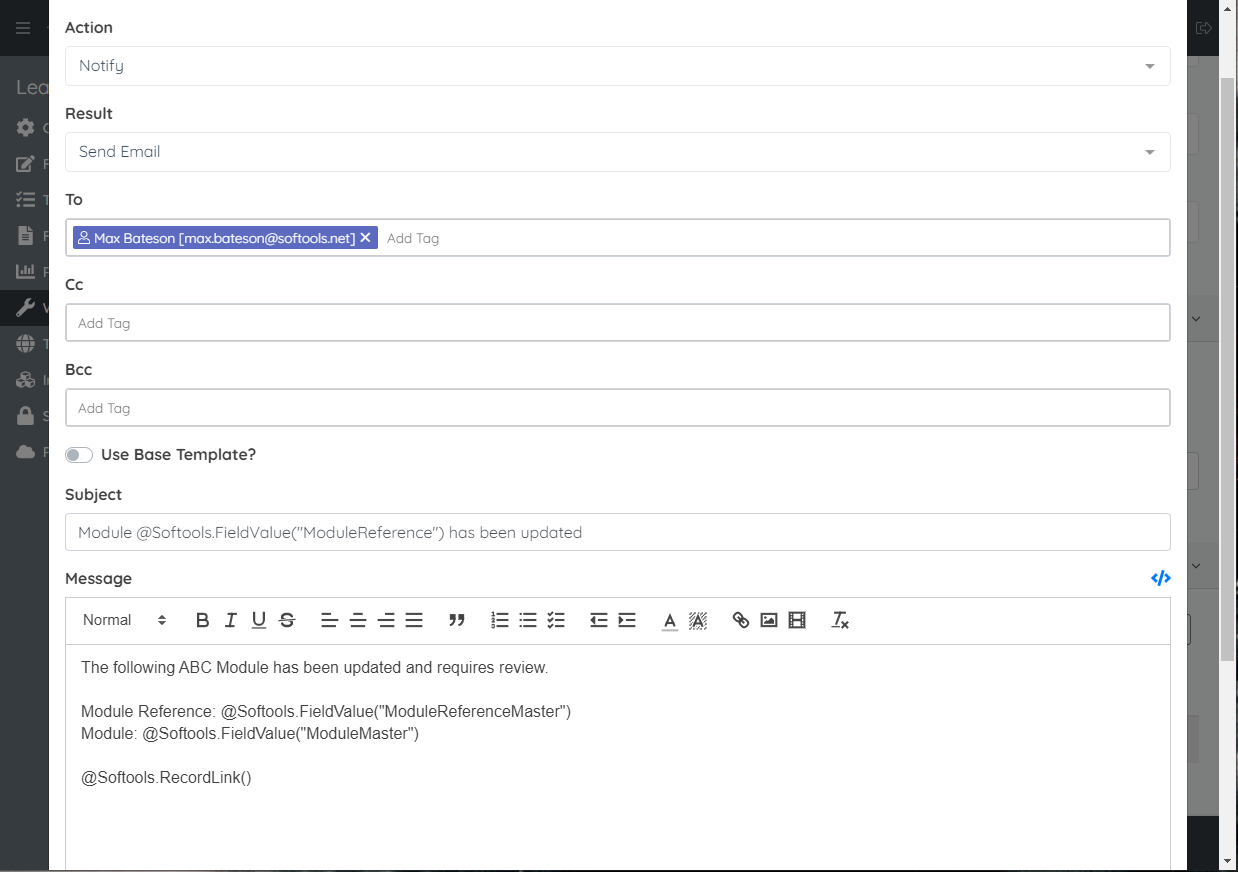
- The action need to be a 'Notify'
For a more in depth look at this please look at this community post I made previously on 'Updating Watchers'. Once the workflow is added you can then create the image action button with a button type as workflow and the workflow trigger as the workflow you just created. Don’t forget to add a image!
After you have created all these fields you can add them in to a template and you are ready to go
Please sign in to leave a comment.
Comments
0 comments