
When Users first log in to their platform they will be directed to a Homepage. The Homepage can have a variety of purposes for different User groups.
A Homepage can be an image that has been uploaded as the landing page for the site.
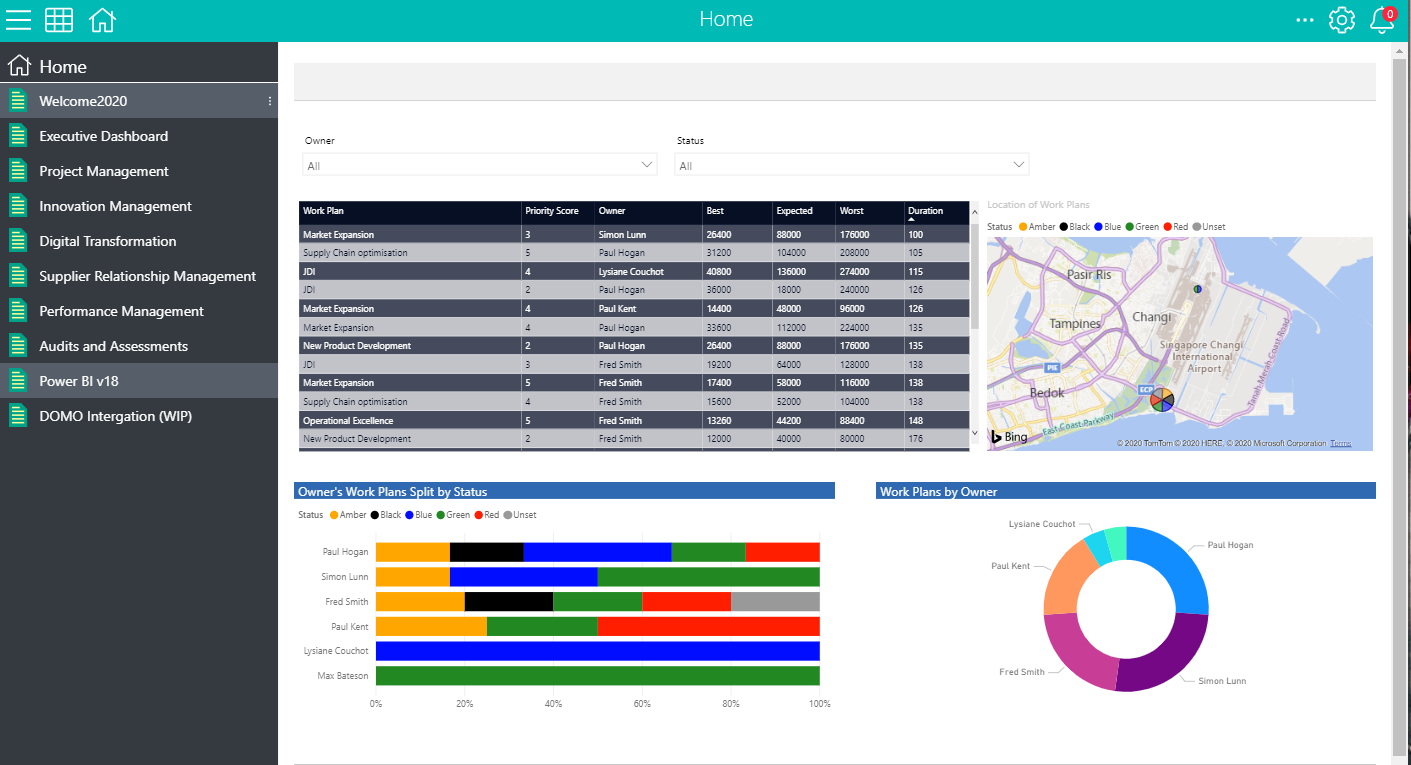
A Homepage can pull information from a variety of apps into a data Dashboard for executives to gain insight into overall performance at a high level.

A Homepage can also include ImageActionButtons to act as an alternative navigation tool for finding and adding data as well as provide external links to integrate other resources.
Note: You can then determine for each User which Homepage they will see on log-in by setting the default Homepage on their User Profile.
Accessing AppStudio
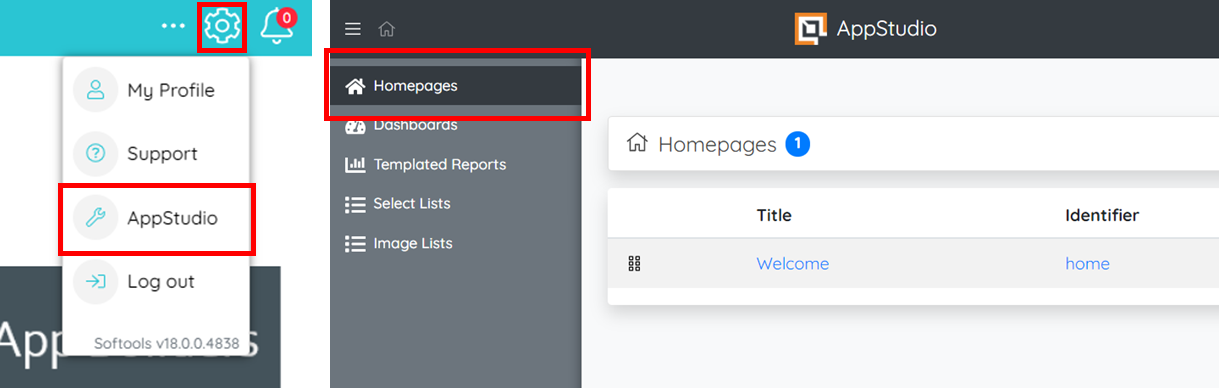
First, find the App that you would like to add a Field to in App Studio. To do this click on the COGs menu and select App Studio which will open App Studio in a new browser tab.
Create a New Homepage
To add a new Homepage select the Homepages folder in the left pane menu and then click on the 'Add Homepage' button on the end of the banner at the top of the screen. This will open a new add homepage screen where we can define how the Homepage will look and what information will be displayed to the User.
Title: The title is the reference to the Homepage that will appear in the UI for the Users. It will appear in the left pane menu for the Site Home and also in the breadcrumb at the top of the page which tells the user where they are on the Site.
Identifier: The identifier is a system ID for referencing a Homepage. By default, the identifier will take it's the value from the Label with any white space and special characters removed. The identifier must be a minimum of three characters, only contain letters and numbers and start with a letter. The identifier will be visible to Users in the URL for the Homepage.
Default Homepage: The default Homepage is the Homepage that the user will be directed to the first time that the user logs in and every time they access the homepages in a new browser tab. If no default has been set, then the user will be taken to the Homepage with the lowest display order.
With the Homepage classification complete a Homepage can now be added in the Basic Builder as either an image or a Dashboard.

Add an Image as a Homepage
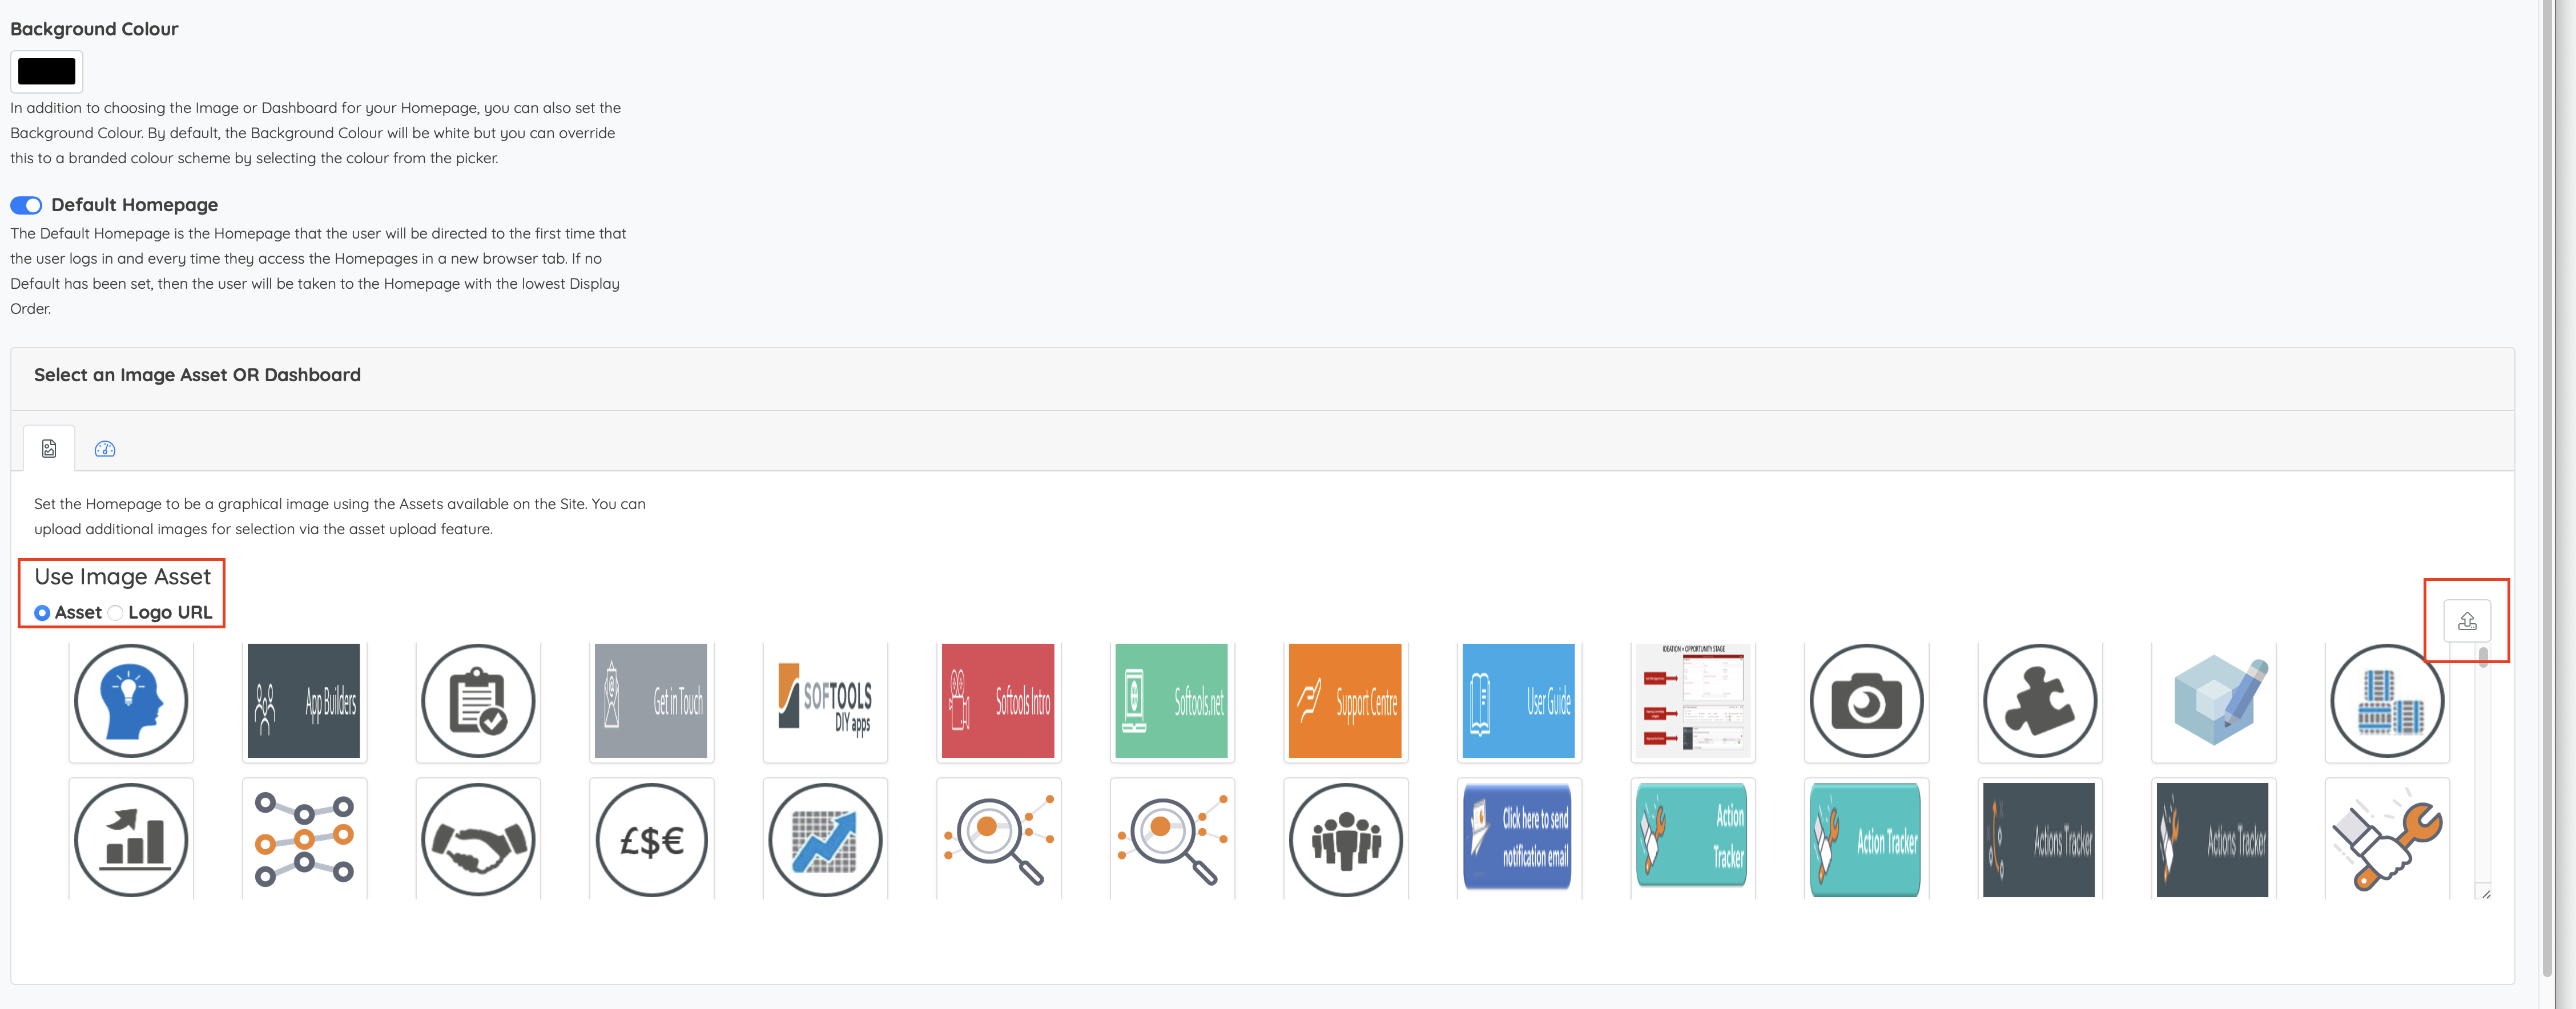
There are two options for setting the Image Asset for the Homepage. The first is to use an image that you already have stored in an online folder. To do this enter the file location as the Image URL.
Alternatively you can upload an Asset to the Site to use as the Homepage. If you have already uploaded the Asset then you can select from the drop down of Image Assets or if it is a new image then you can upload by clicking on the 'Upload New Asset' button. Clicking on the button will pop open an Asset Upload pane allowing you to use drag and drop or choose a file to upload the Asset. Once uploaded click the tick at the top right of the add image pane to confirm selection of the Image that you have uploaded.
The image to be displayed will be responsive based on the width of the screen that it is being viewed on. As a result consider the User groups that will be using the Site. If they are accessing on mobile then small words in an image may be hard to read once the image scales down. Any image file format is acceptable but we suggest using a .png file or if available a .svg to keep image quality when resizing the image for different screen sizes. Height to width ratio of the image should be decided to fit the same ratios as the screens that Users will be viewing the Homepage on.
Setting a Global Dashboard as a Homepage and a Background Colour
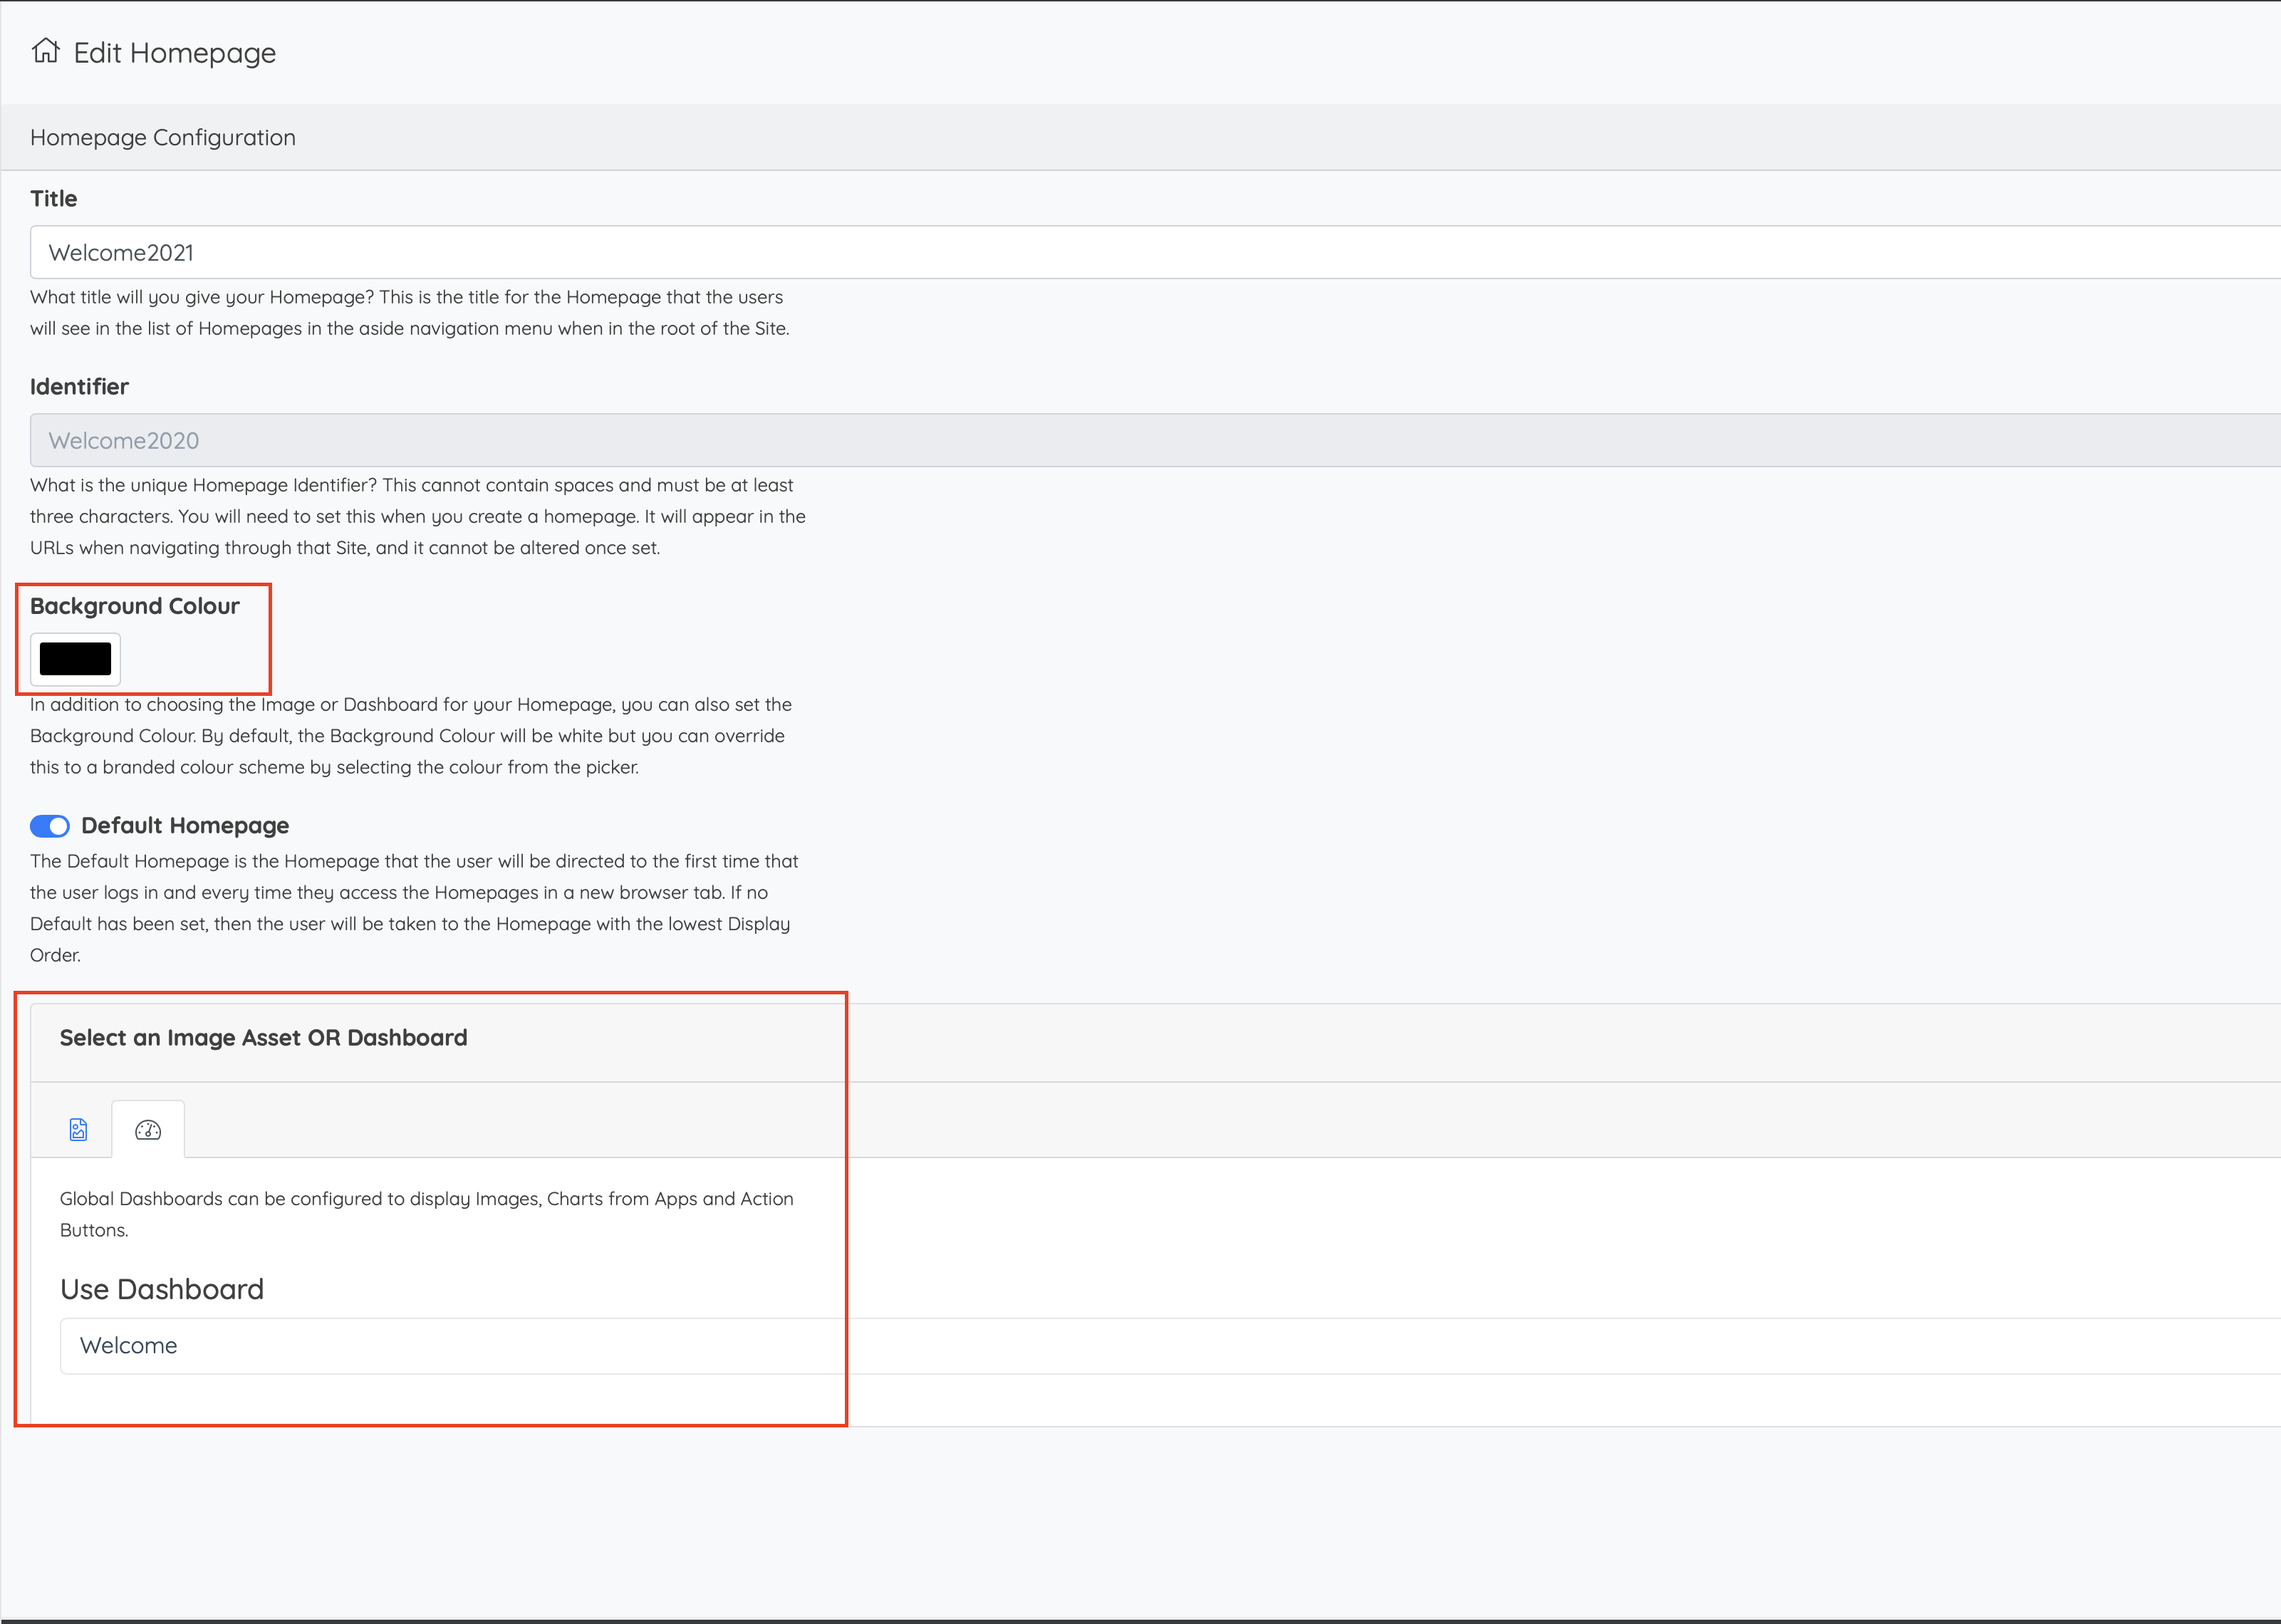
Global Dashboards can be configured to display Images, Charts from Apps and Action Buttons. To configure a Global Dashboard see our article here.
Once you have created a Global Dashboard it will appear for selection in the Dashboard selection option found under 'Use Dashboard'.
In addition to choosing the image or Dashboard for your Homepage, you can also set the background colour. By default, the background colour will be white but you can override this to a branded colour scheme by entering the background colour as a hex colour code.
Setting Homepage Visibility

You will be able to select who is able to see the homepage at the bottom - whether it be an entire team or just a user. You can select multiple teams and multiple users for each homepage. (For more information on teams click here Create a new Team for a group of Users – Softools)
Select these as appropriate and then click save. Remember that changes to homepages will only work after you have logged out and back in again as it is a site-level change rather than app-level where you can use resyncing.
Note: Something else to note is that if the homepage is marked as default but has select visibility to specific teams, users from any other team will simply be shown the next homepage down the list.
Comments
0 comments
Article is closed for comments.