
Fields are the individual data entry points within an App. They form the basis of all data and reporting. They are usually exposed within template as per the diagram below, but can also be hidden to the user and simply used as a hidden value or reporting Field.
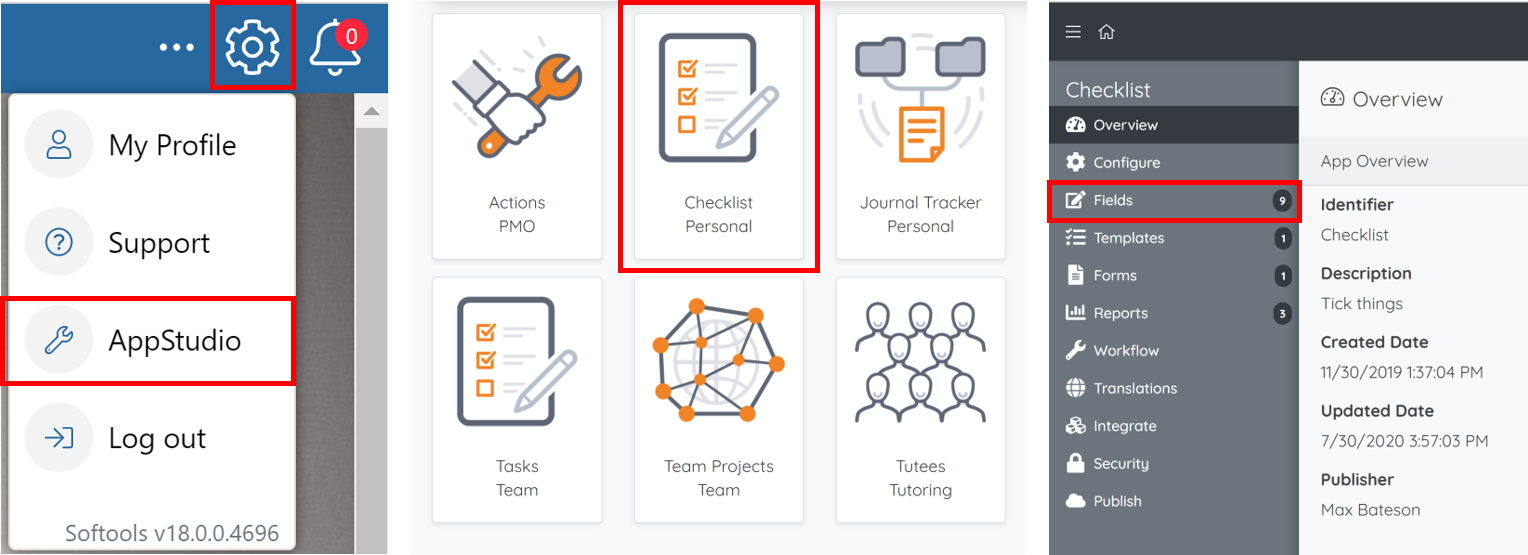
Accessing AppStudio
First, find the App that you would like to add a Field to in App Studio. To do this click on the COGs menu and select App Studio which will open App Studio in a new browser tab. Once in App Studio select the App that you are adding the Field to. Lastly, click on Fields folder in the App configuration to see a list of the Fields in the App.
Adding a new Field for an App
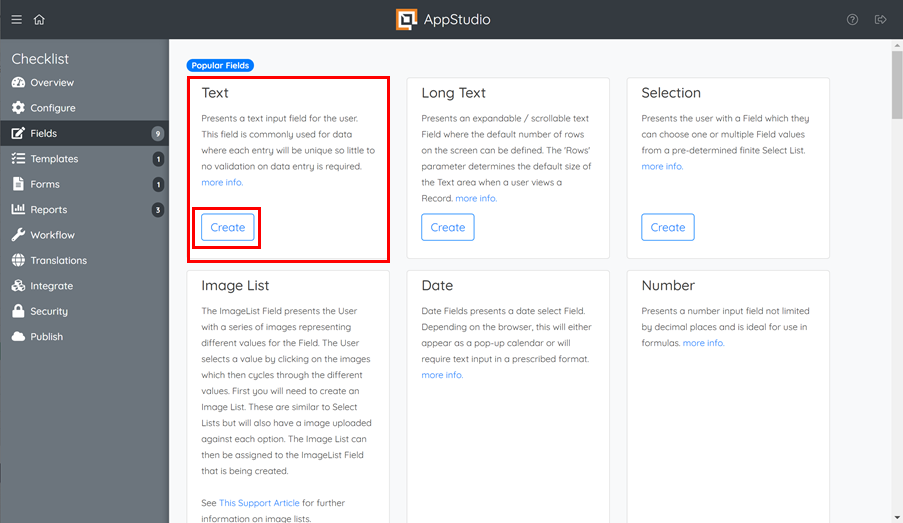
To add a new Field select the Fields folder in the left pane menu and then click on the 'Add Field' button on the end of the banner at the top of the screen. This will open a new add field page where you can select the field type you want to use.
Field Type: There are several different field types, ranging from simple text entry fields to complex grids of fields. Selecting a specific field type will expose the parameters required to enable the field to function correctly and dictate the expected format of the data. For a full list of the Field Types available see our support article on selecting the correct Field Type. There is a short description of the field on the select page to help you pick. Once you know the field you want to use select the 'Create' button.
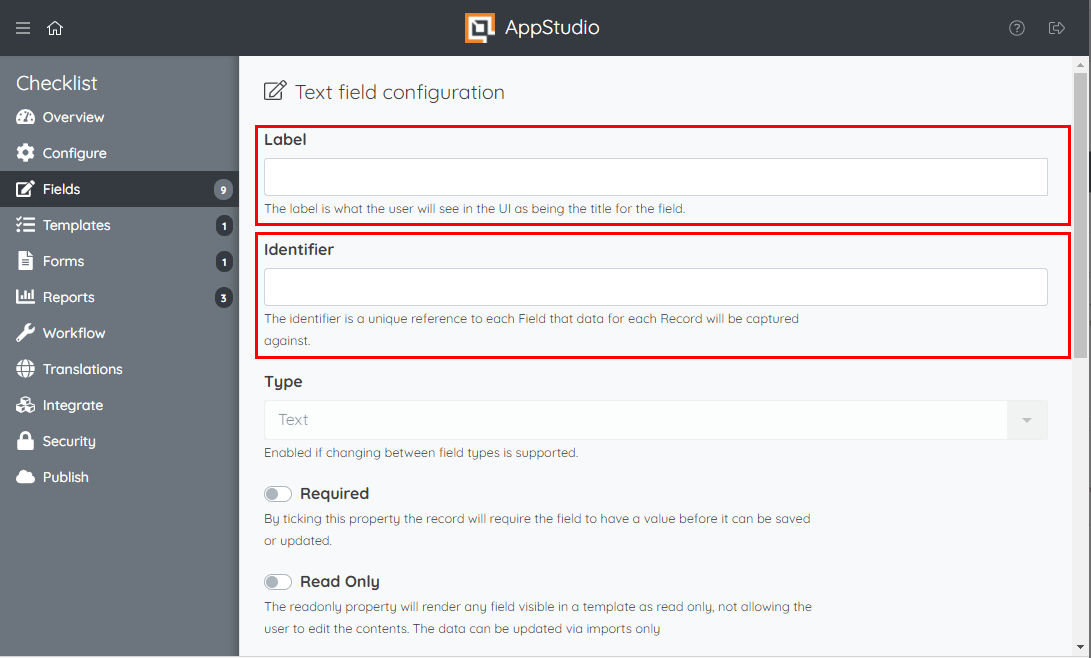
Label & Identifier
The two minimum fields you need to fill in to create a field. Once these are filled in you can then create the field by selecting the 'Create' option at the bottom of the page unless there are any more field validations needed for the specific field type.
Label: The label is what will appear beside the Field on a Record to tell Users what data point is being captured by the Field.
Identifier: The identifier is a unique reference to each Field that data for each Record will be captured against. By default, the identifier will take its value from the Label with any white space and special characters removed. The identifier must be a minimum of three characters, only contain letters and numbers and start with a letter. The identifier will be visible to Users as the column headers in a .csv export of the data from an App.
Once you have filled in these details for the Field you can save the Field by clicking on the tick at the top right of the screen. This will create the Field that you can then use expose to Users by adding them to Templates and Reports.
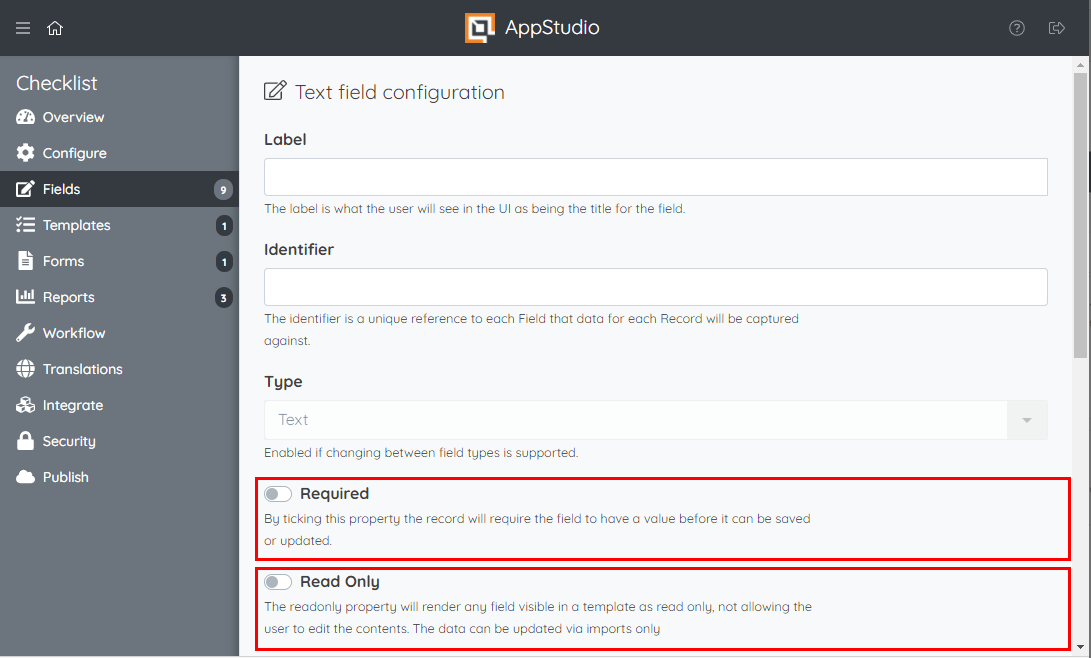
Required & ReadOnly
Two more features that are common across the majority of Fields are Required and ReadOnly
Required: By ticking this option a newly created Record will need to have a value in this Field before it can be created or updated. It will appear with a red outline until a value has been entered to show that it is required.
ReadOnly: When a Field has been set to ReadOnly it cannot be edited by a User through the UI. It will appear as greyed out and not allow Users to edit the value. It will allow for data to be entered into the Fields via a .csv import of data.
Field Parameters and Validation
Depending on the Type of Field that you have selected you will be able to set validation rules to restrict the value that a user can enter into the Field.
By selecting a Text Field there is the option to set 'Length' which will limit the entry to a specified number of characters.
A Range Field allows you to specify a 'Min Value' and 'Max Value' to set which value the slider on the range Field will move between.
A LongText Field allows you to set the default height of the Text Box bys a number of 'Rows'.
For a full list of validation that can be added across Field Types see our article here on Field Parameters.
Expressions and Default Values
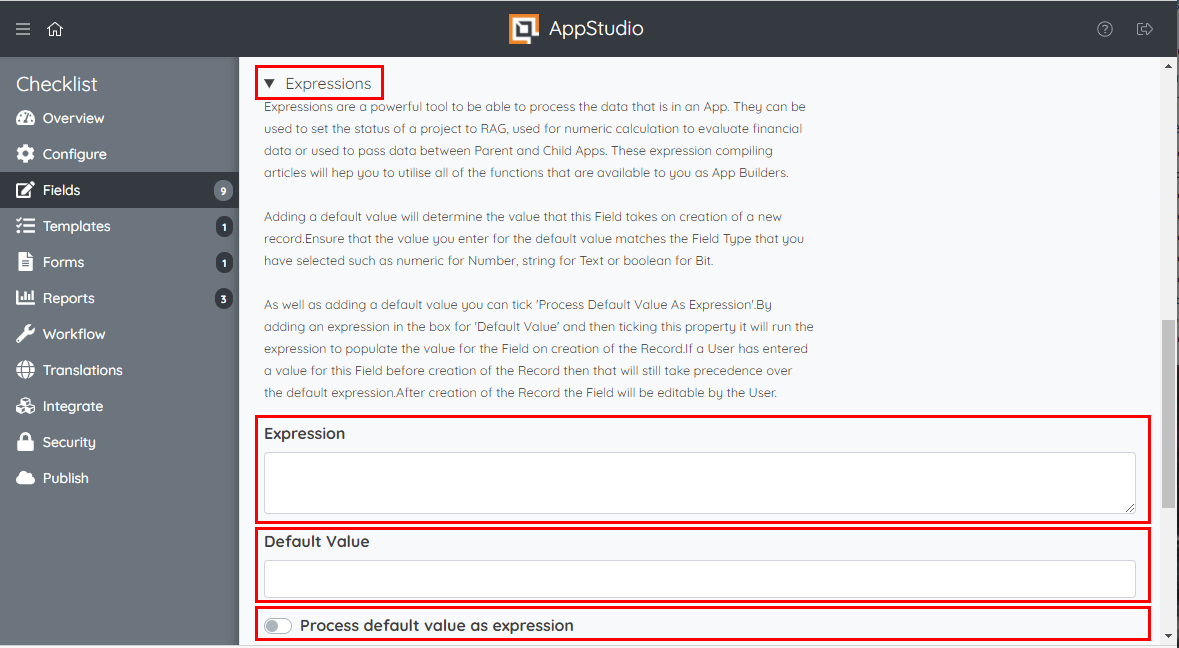
Expressions can be accessed by clicking on the drop-down arrow. Expressions are a powerful tool to be able to process the data that is in an App. They can be used to set the status of a project, used for a numeric calculation to evaluate financial data or used to pass data between Parent and Child Apps. These expression compiling articles will help you to utilise all of the functions that are available to you as App Builders.
Adding a default value will determine the value that this Field takes on the creation of a new record. Ensure that the value you enter for the default value matches the Field Type that you have selected such as numeric for Number, string for Text or boolean for Bit.
As well as adding a fixed default value you can tick 'Process Default Value As Expression'. By adding an expression in the box for 'Default Value' and then ticking this property it will run the expression to populate the value for the Field on the creation of the Record. If a User has entered a value for this Field before the creation of the Record then that will still take precedence over the default expression. After the creation of the Record, the Field will be editable by the User.
The default value is only ever used when the record is created, either as a fixed value, or if "Process default value as expression" is used, the expression is calculated once when the record is created.
Once created, then default value will never be used again.
If you want the field to contain a calculated value permanently, then you will need to use the Expression parameter of the field, not the default value, - see the articles references in the paragraph above
Format Strings
To access the format area click the drop-down arrow next to 'Formatting'. Adding a Format String will convert the input or expression value into the chosen format that the user selected. It does this by adding a _Formatted backing Field that contains the formatted string value of the Field. You can then use this formatted backing Field for Read-Only display in Records and Reports.
Display Formatted: if this option is selected it will turn the field into readonly and display the formatted version of the data in the field. The _Formatted version of the field will still need to be used in reports and exports though if you want it to been seen.
See our article on Format Strings for a full list of the options available to add format strings to numeric and date Fields

Optional Properties
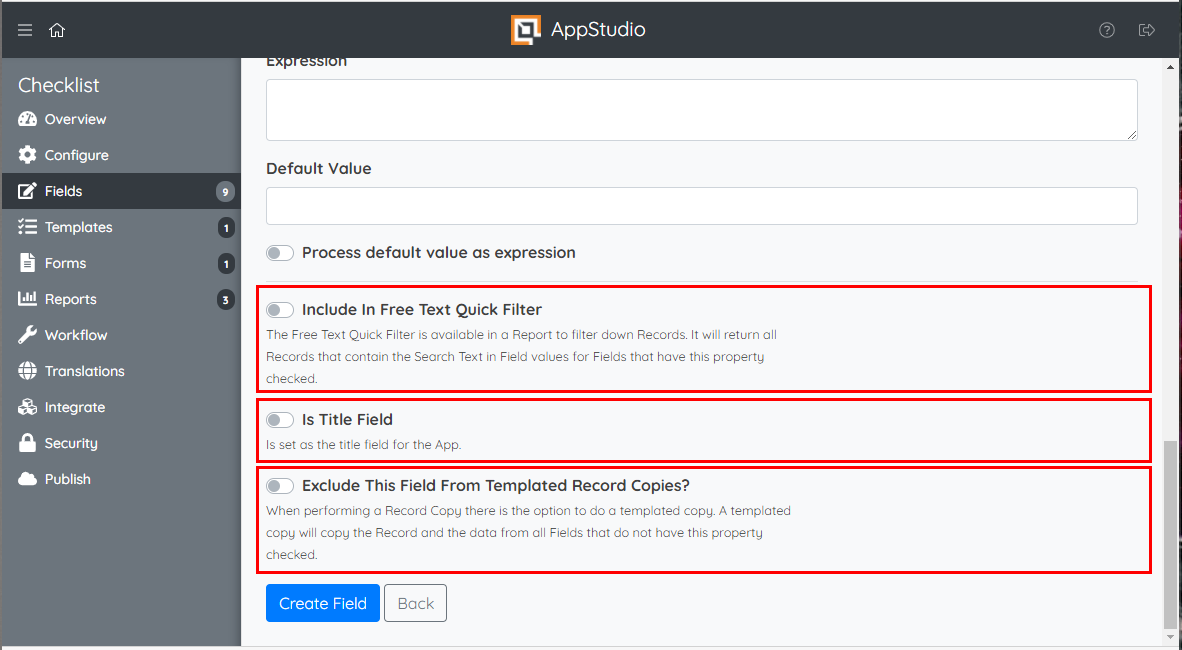
Include In Free Text Quick Filter: The Free Text Quick Filter is available in a Report to filter down Records. It will return all records that contain the Search Text in Field values for Fields that have this option checked.
Note: adding this parameter to an existing field where there is already data in records will not immediately make that data appear in search results. At the point of a record save, the quick search data is pulled together for all fields with the parameter set, so adding the parameter to an existing used field will usually mean the records will need to be resaved, possibly by import.
Is Title Field: This sets the title field for the app, the title field is what appears as the header for a record on the app homepage, this can only be set on one field. If you want it to show multiple values you can concatenate them all into one field and use that. (Only for a text field)
Exclude This Field From Templated Record Copies: When performing a Record Copy there is the option to do a templated copy. A templated copy will copy the Record and the data from all fields that do not have this property checked.
Make sure to click the 'Save' button when making any changes in order for them to be added to the next app version. Once you have made all the changes you need to an application you are then ready to publish it to workspace.

Comments
0 comments
Article is closed for comments.